
Managing Local DNS Records
On macOS, managing local DNS records is very useful for developing, testing, and debugging web applications. ServBay provides a local dnsmasq server, making it easier to add, modify, pause, and delete DNS records. This article will detail how to use ServBay to manage local DNS records.
TIP
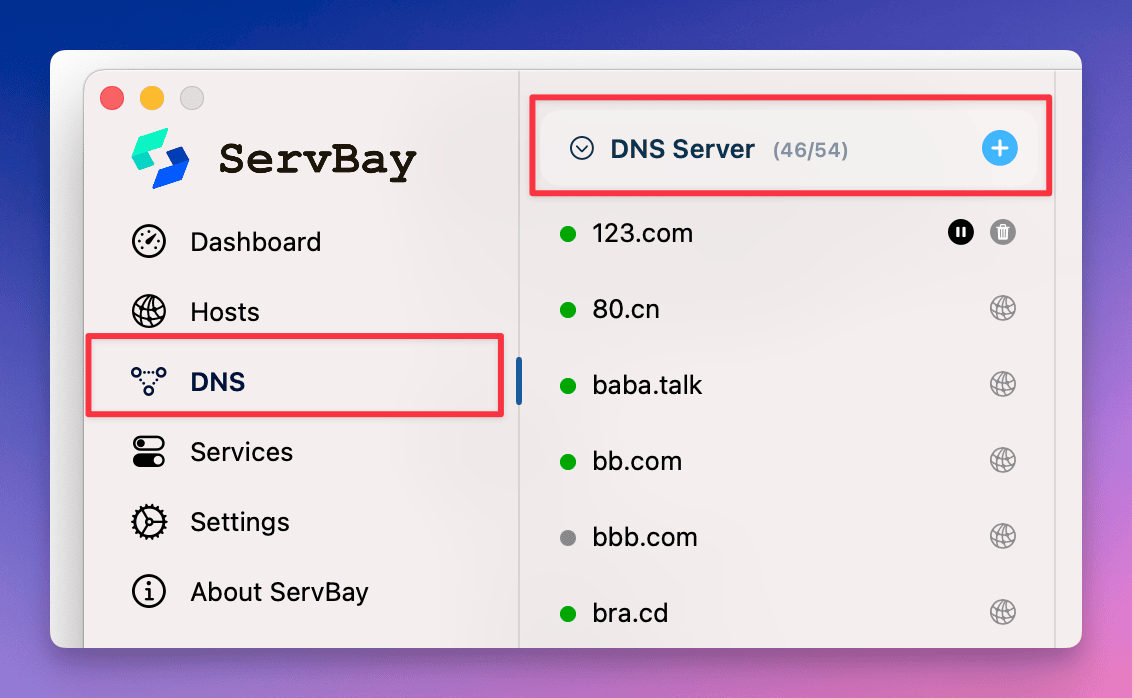
For websites added from ServBay's Host feature, these records will display a small globe 🌐 icon on the right side of the DNS record. These records need to be managed through the Host feature and cannot be managed directly in the DNS records.
Viewing Current Local DNS Records
With ServBay, you can easily view the contents of current local DNS records. ServBay uses dnsmasq server to handle these records, making management more convenient.
Viewing Steps
- Open the ServBay management interface.
- Navigate to
DNS. - In the list on the right, select
DNS Server. - ServBay will display the current DNS records.
This way, you can intuitively see all configured domain and IP address mappings.
Adding a Record to Local DNS
During development or testing, you might need to map a domain to a specific IP address. With ServBay, you can easily add a record to the local DNS.
Adding Steps
- Open the ServBay management interface.
- Navigate to
DNS. - In the list on the right, select
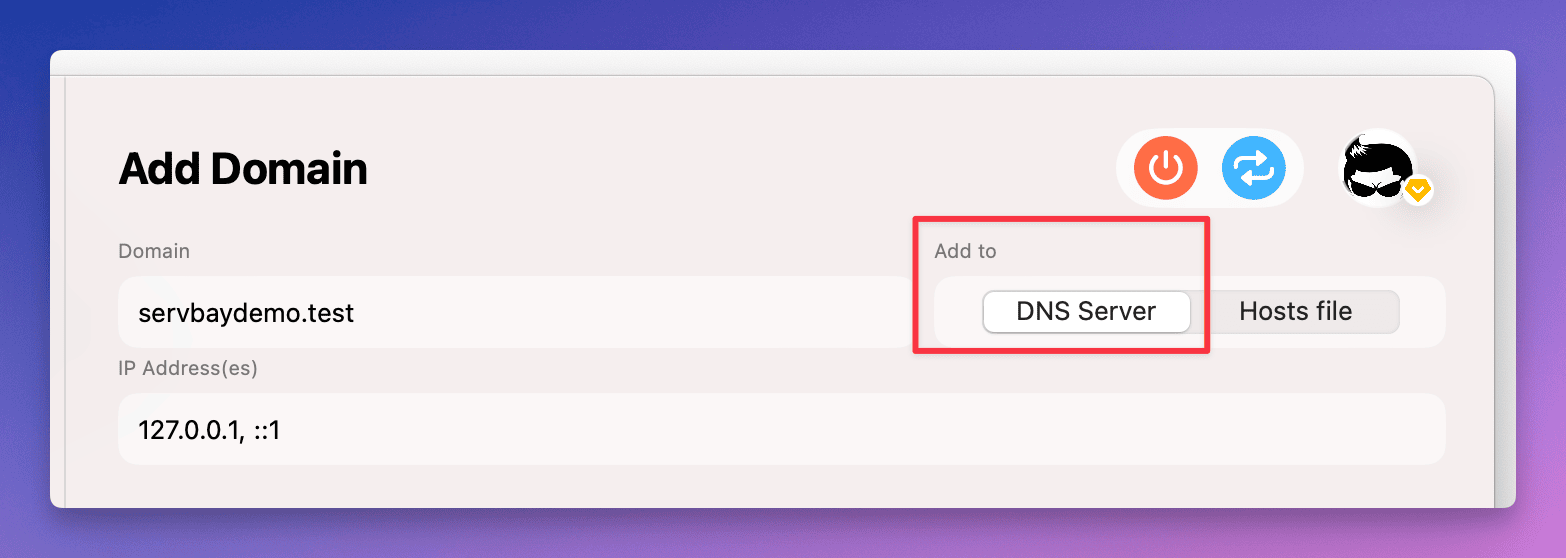
DNS Server. - Click the
+button. - Enter the domain name and corresponding IP address, for example:
servbay.demo 127.0.0.1 - Click the
Addbutton.
This will add the new domain and IP address mapping to the local DNS records.
TIP
ServBay supports adding multiple IP addresses and also supports adding IPv6 addresses. Separate multiple IP addresses with commas (,).
Modifying a Local DNS Record
Sometimes, you might need to modify the existing domain and IP address mapping. With ServBay, you can easily modify a record in the local DNS.
Modifying Steps
- Open the ServBay management interface.
- Navigate to
DNS. - In the list on the right, select
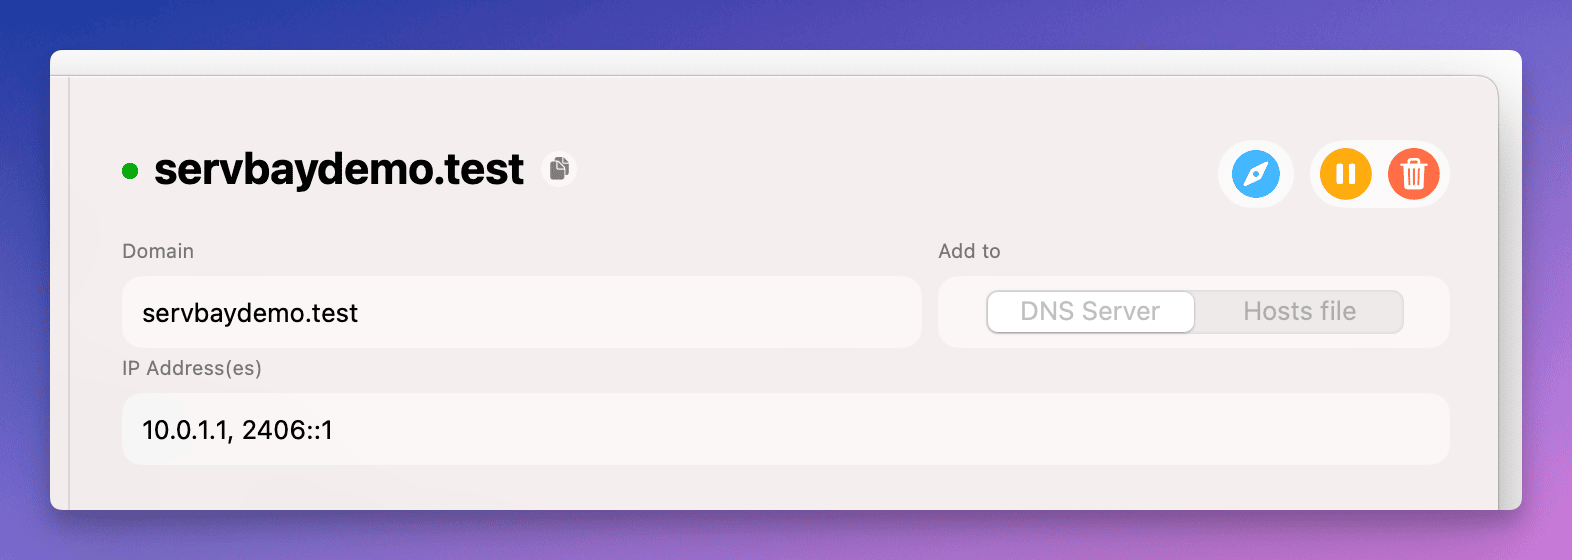
DNS Server. - Find the record you need to modify.
- Click the record.
- In the panel on the right, modify the domain or IP address, for example:
servbay.demo 127.0.0.1 -> servbay.demo 10.0.0.1 - Click the
Savebutton.
This will update the specified record in the local DNS records.
Pausing a Local DNS Record
In some cases, you might need to temporarily pause the resolution of a record without deleting it. With ServBay, you can easily achieve this.
Pausing Steps
- Open the ServBay management interface.
- Navigate to
DNS. - In the list on the right, select
DNS Server. - Find the record you need to pause.
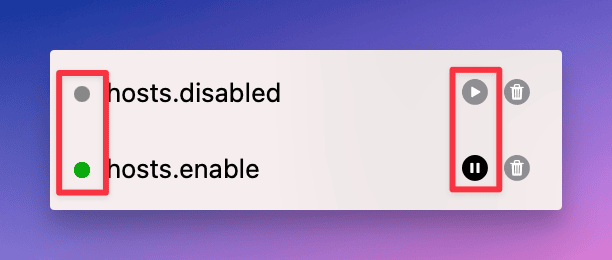
- Click the
Pausebutton next to the record.
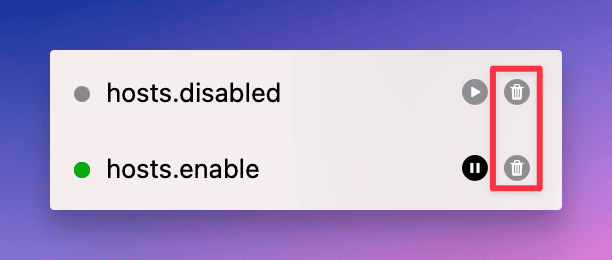
ServBay will automatically pause the resolution of the record, and the icon in front of the record will change from green to gray.
Deleting a Local DNS Record
If a record is no longer needed, you can delete it from the local DNS records via ServBay.
Deleting Steps
- Open the ServBay management interface.
- Navigate to
DNS. - In the list on the right, select
DNS Server. - Find the record you need to delete.
- Click the
Deletebutton next to the record. - Confirm the deletion.
This will remove the specified domain and IP address mapping from the local DNS records.
Summary
ServBay provides a convenient interface to manage local DNS records on macOS, making it simpler and more intuitive to view, add, modify, pause, and delete records. With these features, you can more efficiently develop, test, and debug web applications. Whether adding new domain mappings or modifying existing records, ServBay meets your needs and ensures the flexibility and controllability of the local network environment. By using ServBay's dnsmasq server, you can easily manage local DNS records and improve development and testing efficiency. For websites added via ServBay's Host feature, you need to manage them through the Host feature to ensure the accuracy and consistency of all records.