
Guide to Configuring Ngrok Reverse Proxy Service in ServBay
Ngrok is a powerful tool that securely exposes your locally running web services to the public internet. With Ngrok integrated into ServBay, you can easily create secure public tunnels for your local development websites—perfect for project demos, webhook testing, or sharing your work with external team members. This guide will walk you through the detailed steps of configuring and using the Ngrok reverse proxy service within ServBay.
Overview
ServBay offers built-in support for Ngrok, streamlining its installation and configuration process. You can conveniently manage Ngrok tunnels through ServBay’s graphical interface, mapping any locally hosted website to a temporary public URL with just a few clicks.
Use Cases
- Client Demos: Showcase in-development websites running on your local machine directly to clients.
- Webhook Development: Test third-party services that require a public callback URL (e.g., payment gateways, APIs).
- Mobile App Testing: Allow mobile devices to access your local backend APIs via public URLs.
- Collaborative Development: Temporarily share access to your local development environment with team members.
Prerequisites
- ServBay Installed: Ensure ServBay is successfully installed and running on your macOS system.
- Ngrok Account: You need an Ngrok account. Visit the Ngrok official website to register for a free or paid plan.
- Local Website: At least one local website (such as
servbay.demo) must be added and running in ServBay.
Steps
1. Install the Ngrok Package in ServBay
Before using Ngrok, you need to install it via ServBay:
- Open the ServBay application.
- In the left sidebar, click Packages.
- Locate or search for
Ngrokin the package list. - Click the Install button next to
Ngrok. - Once installation is complete, try clicking the start toggle to the right of
Ngrok. Since Ngrok isn't configured yet, the service might fail to start or show an abnormal status—this is normal. Configuration will be completed in the following steps.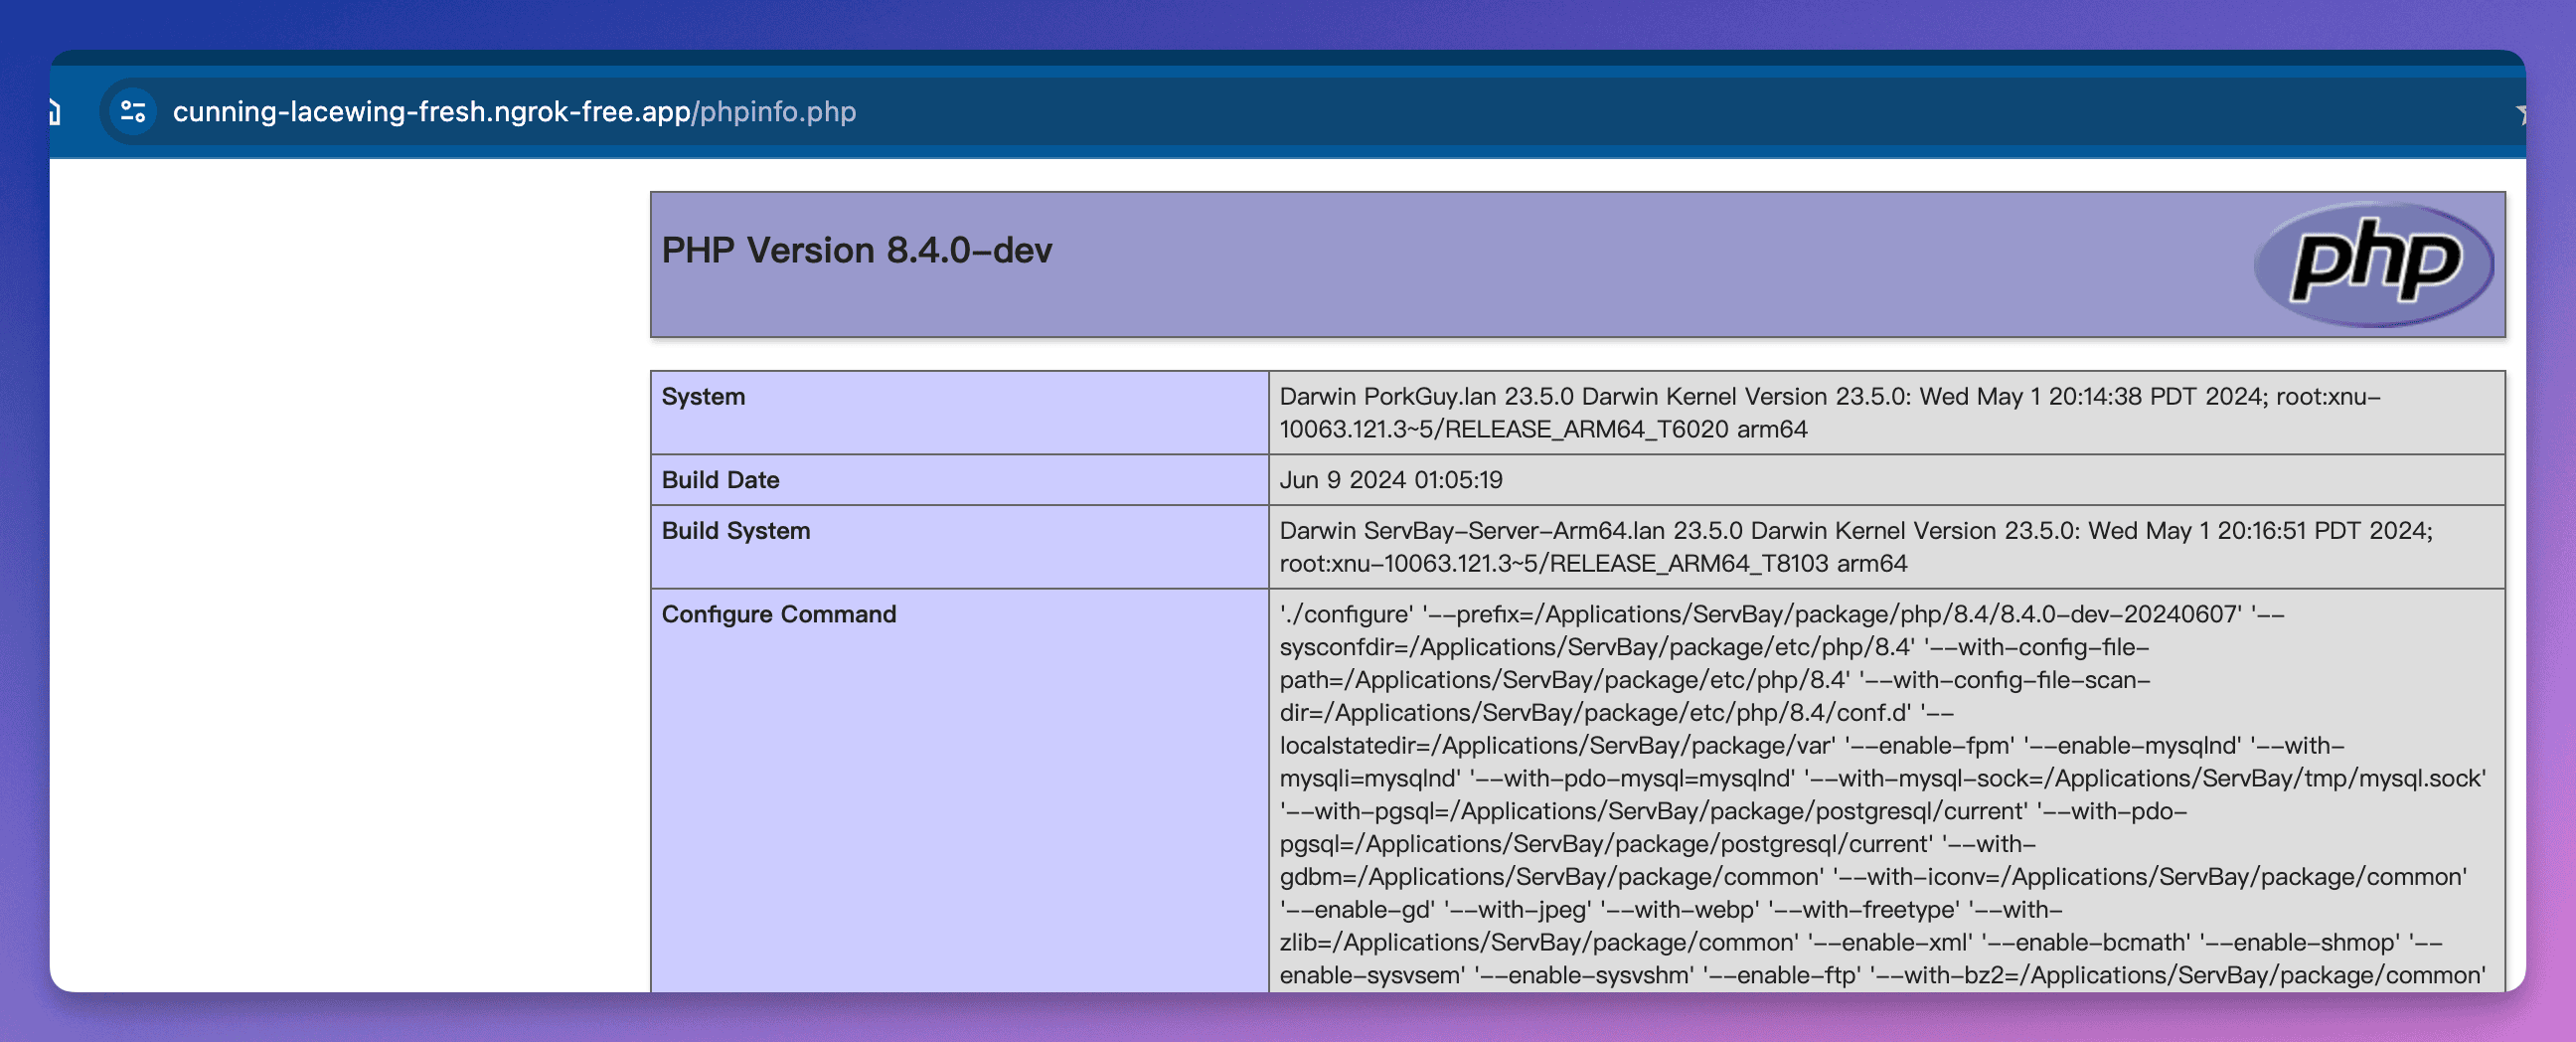
2. Obtain Your Ngrok Authtoken
Ngrok uses an Authtoken to verify your account and authorize access to its services.
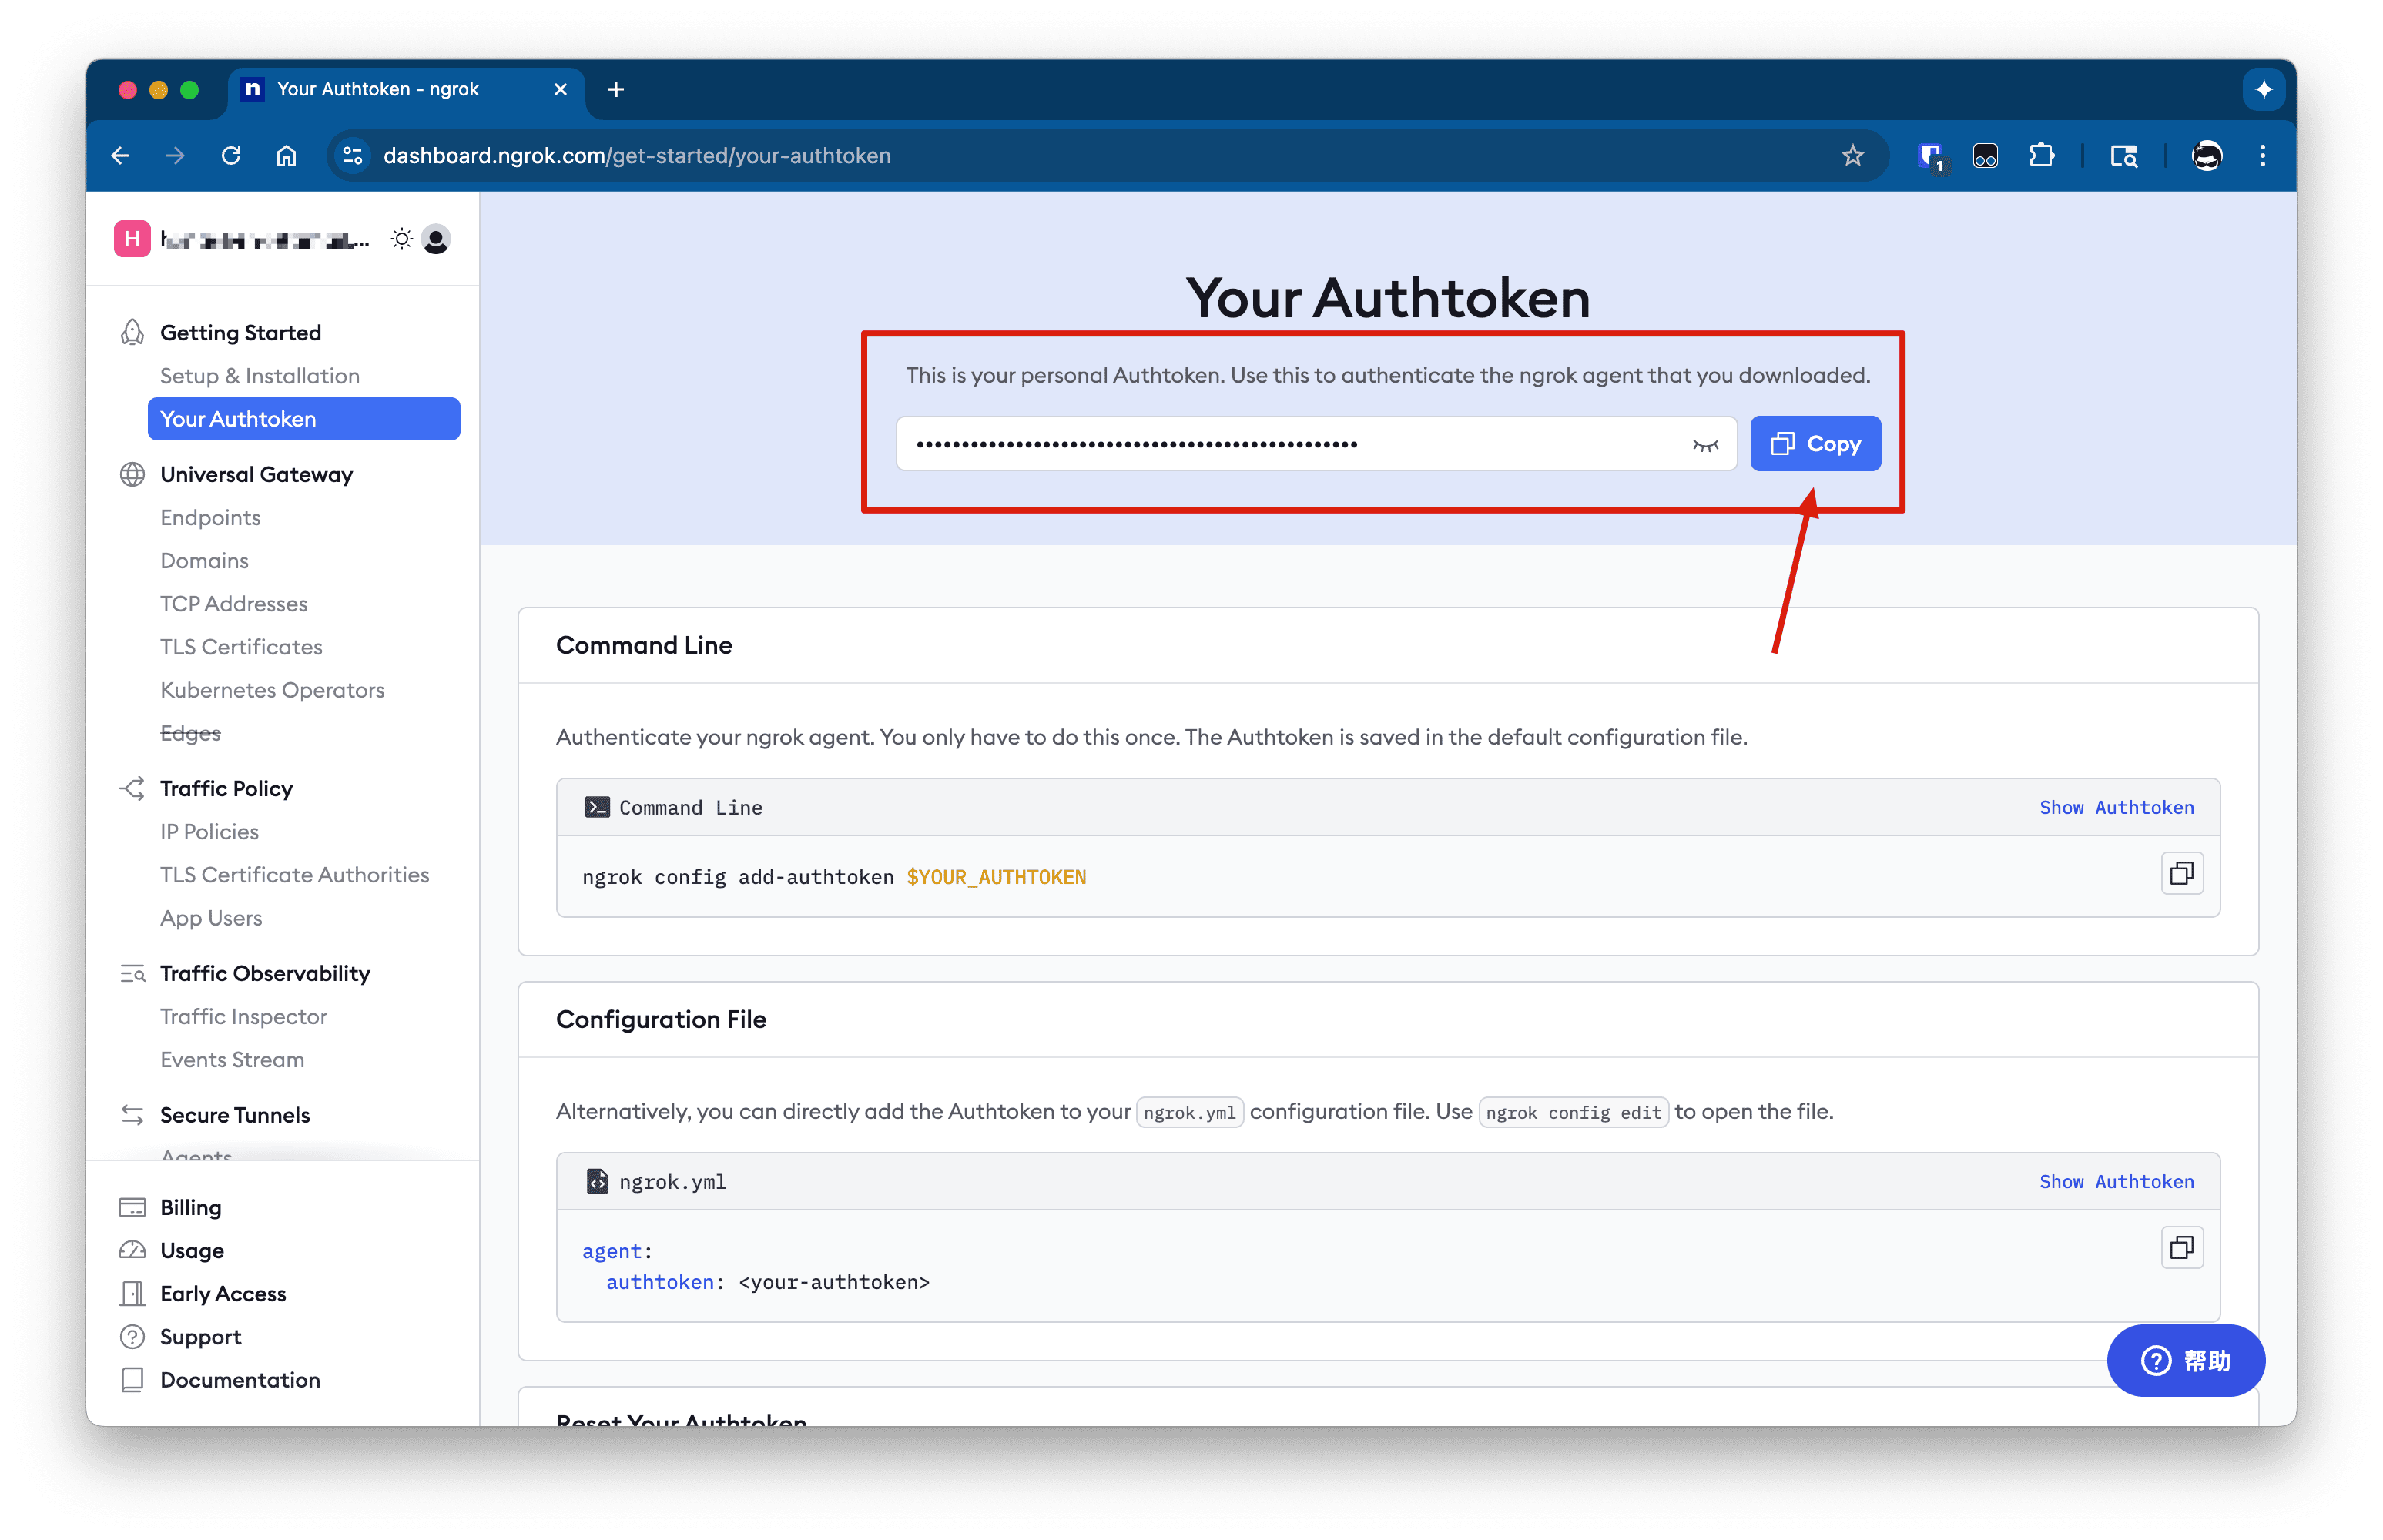
Visit Ngrok Dashboard and log in to your account.
Once logged in, find Your Authtoken in the navigation menu on the left (under "Getting Started" -> "Your Authtoken").
Copy your Authtoken—which is a long string. Keep it safe and secure.
3. Configure Ngrok in ServBay
Once you have your Authtoken, return to ServBay to finish configuration:
In the left sidebar of ServBay, click Tunnel.
From the Tunnel service list, select ngrok.
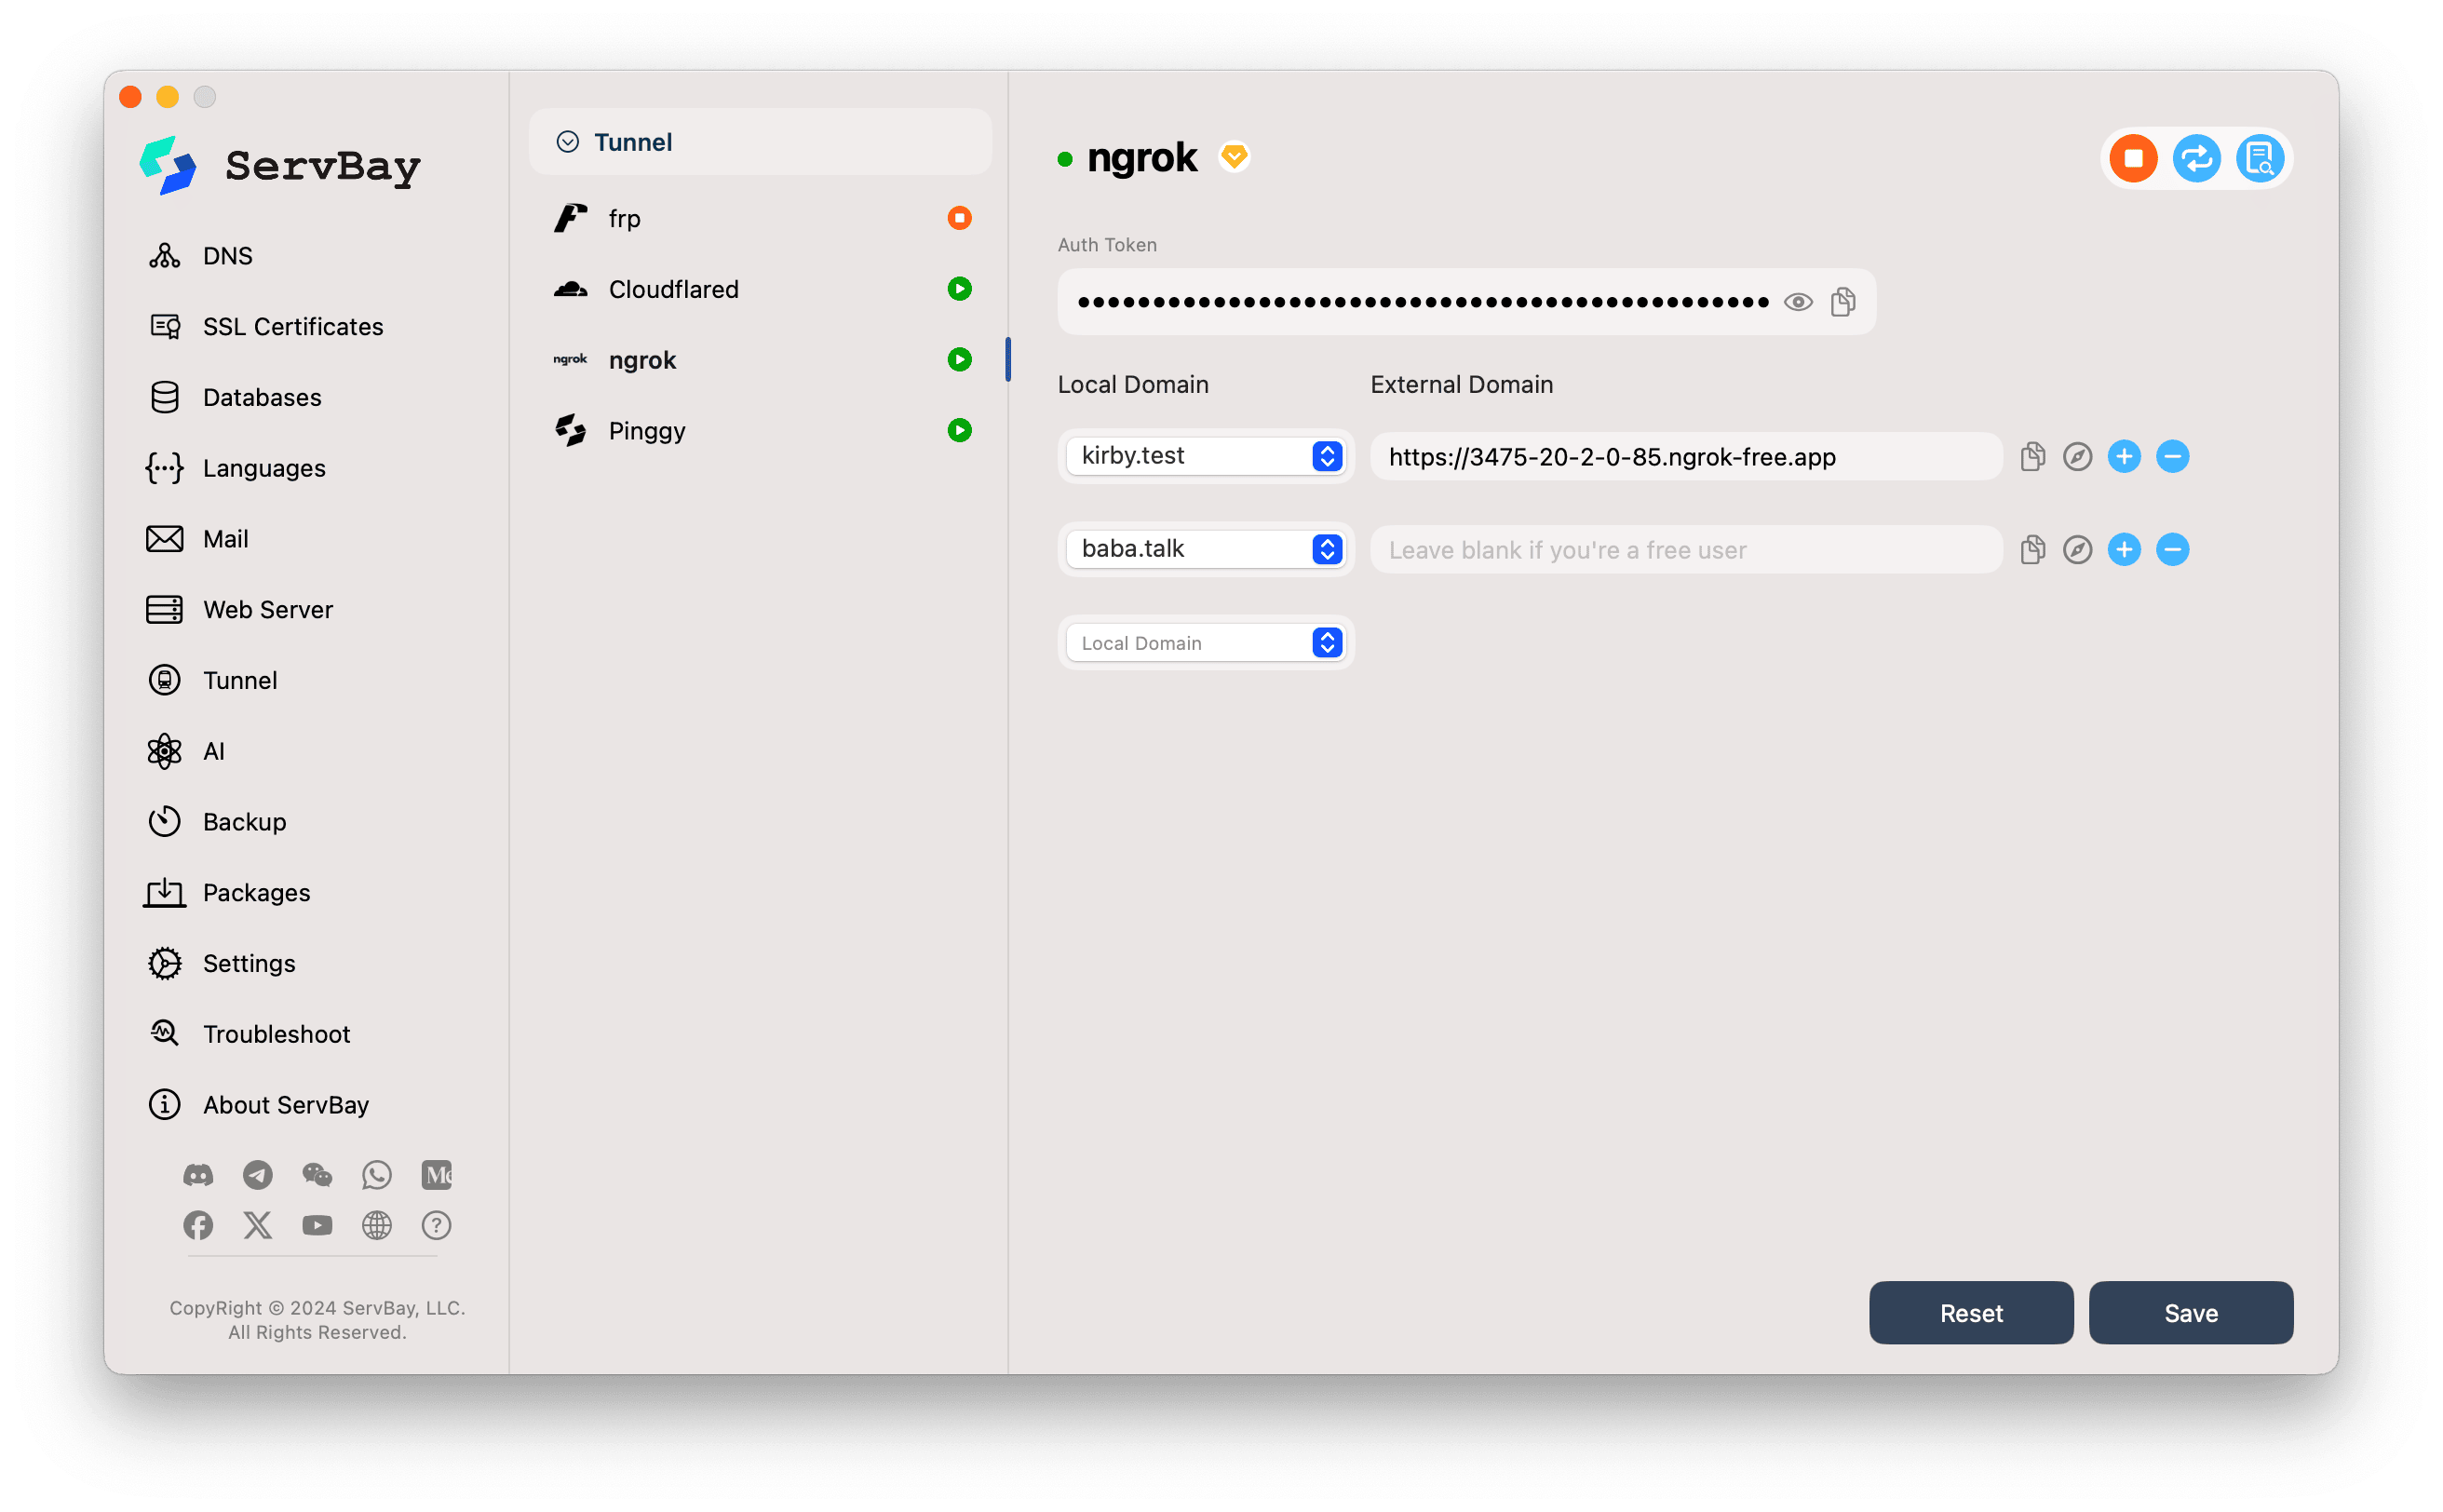
Auth Token:
- Paste the Ngrok Authtoken you copied earlier into the
Auth Tokeninput box.
- Paste the Ngrok Authtoken you copied earlier into the
Configure Tunnels (Local Domain & External Domain): ServBay allows you to create Ngrok tunnels for multiple local websites.
- Local Domain:
- Click the dropdown menu and select the local website you want to expose via Ngrok. This list will auto-populate with websites you’ve already added to ServBay, such as
servbay.testorservbay.demo.
- Click the dropdown menu and select the local website you want to expose via Ngrok. This list will auto-populate with websites you’ve already added to ServBay, such as
- External Domain:
- For Ngrok Free Users: Leave this field blank. Ngrok will automatically generate a random public URL (ending with
.ngrok-free.appor other Ngrok-provided domains) for your tunnel. When the tunnel starts successfully, ServBay will display the generated URL here. - For Ngrok Paid Users: If you’ve set up a custom or reserved domain in your Ngrok account, you can enter your desired external domain in this field.
- For Ngrok Free Users: Leave this field blank. Ngrok will automatically generate a random public URL (ending with
- Local Domain:
Add More Tunnels:
- To create tunnels for multiple local sites, click the
+(plus) button to the right of the existing tunnel entry to add a new tunnel configuration. Repeat step 4 for each entry to choose its local website and configure the external domain.
- To create tunnels for multiple local sites, click the
Save Configuration:
- Once you’re done configuring, click the Save button in the lower right corner.
4. Start and Verify Ngrok Service
- After saving, ServBay will attempt to start the Ngrok service using the new configuration.
- Watch the status indicator beside the
ngrokservice entry. If everything is set up correctly and Ngrok connects successfully, the indicator should turn green to show the service is running. - For each successfully launched tunnel, the
External Domainfield (if left blank before) will now display the public URL assigned by Ngrok. - Verify Access:
- Click the copy icon beside the external domain to copy the URL.
- Or click the browser icon (usually a compass or globe) to open the public URL in your default browser.
- If all goes well, you should be able to access your local website using the Ngrok URL.
5. Managing Ngrok Tunnels
In ServBay’s Ngrok configuration interface:
- Copy External Domain: Click the copy icon for easy sharing.
- Open in Browser: Click the browser icon for quick testing.
- Add Tunnel: Click the
+icon. - Remove Tunnel: Click the
-(minus) icon to remove tunnels you no longer need. - Stop Service: Click the toggle beside the
ngrokservice entry to stop the entire Ngrok service. Click again to attempt a restart.
Notes
- Ngrok Free Version Limitations: The public domain generated for Ngrok free users is dynamic and may change each time you restart the service or tunnel. The free version also has restrictions on connections, bandwidth, and session duration. Consider upgrading to a paid plan for reserved domains and enhanced features.
- Local Service State: Ensure that any local website you select in
Local Domainis running properly within ServBay (i.e., the matching PHP version, web server like Nginx/Apache is started, and your site is correctly configured). Ngrok only forwards traffic—it cannot start or fix your local services. - Firewall: Ensure that your macOS firewall or any third-party security software isn't blocking ServBay or Ngrok's network access.
- HTTPS: Ngrok provides HTTPS support for tunnels by default—essential for modern web development and testing.
Frequently Asked Questions (FAQ)
- Q: Ngrok service fails to start; the status indicator is red or orange. What should I do?
- A: First, check whether your Ngrok Authtoken is entered correctly. Next, verify your internet connection and ensure you can access the Ngrok official website. For more details, check Ngrok logs (click the log icon beside the service).
- Q: I’m a free Ngrok user, why is the
External Domainfield empty or does it say "Leave blank if you're a free user"?- A: This is expected. Free users should leave this field empty. Once the tunnel starts, ServBay will automatically fetch and display your randomly assigned public URL from Ngrok.
- Q: Can I use Ngrok alongside other tunnel services (like frp, Cloudflared)?
- A: ServBay lets you install and configure multiple tunnel services. Typically, you can activate one or more as needed. Exposing the same local website via multiple tunnel services at the same time may create complex configurations or networking conflicts, so proceed with caution and make sure you understand the network routing involved.
Conclusion
With Ngrok integrated into ServBay, web developers can greatly simplify the process of exposing their local development environments to the public internet on macOS. Whether it's for quick demos, webhook testing, or sharing with collaborators, ServBay’s Ngrok features provide a convenient and efficient solution. Remember to configure your external domains properly according to your Ngrok account type (free or paid) and always ensure your local services are running smoothly.
