
Setting Up Reverse Proxy in ServBay: Map Internal or Remote Sites to Your Local Environment for Development & Debugging
ServBay is a local web development environment supporting macOS and Windows. It integrates multiple language stacks such as PHP, Node.js, Python, Go, and Java, along with databases like MySQL, PostgreSQL, MongoDB, and Redis. Beyond hosting local code projects directly, ServBay also offers robust reverse proxy capabilities. Through reverse proxy, you can easily map web sites located in intranets, virtual machines, containers, or even remote servers to your local ServBay environment, streamlining your development, debugging, and access workflows.
This article provides a detailed walkthrough on setting up reverse proxy in ServBay, helping you proxy websites from internal networks or any accessible addresses to your local machine for unified management and efficient development.
Overview
A reverse proxy server receives requests from clients (like your browser) and forwards them to one or more backend servers—here, the internal or remote sites you want to proxy. ServBay leverages its built-in web servers (Caddy or Nginx) to deliver this feature.
In local development, the main advantages of reverse proxy include:
- Unified Access Point: Access all internal or external resources conveniently through local ServBay domain names, without remembering complex IP addresses and ports.
- Simplified SSL Setup: Seamlessly use ServBay's SSL management (such as ServBay CA or ACME) to enable HTTPS for proxied sites, even if the back-end only supports HTTP.
- Local Debugging: Easily debug remote or intranet web applications in your local browser environment.
- Bypass Network Restrictions: In certain scenarios, it's possible to access company intranet or restricted resources from your local workspace (provided the ServBay machine can reach the target address).
Prerequisites
Before setting up reverse proxy, confirm the following requirements:
- ServBay Installed & Running: Ensure ServBay is correctly installed on your macOS system and actively running.
- Target Website is Reachable: The web site you want to proxy (internal or remote) should be running, and your macOS machine (where ServBay is running) must be able to access its IP/domain and port directly via the network. For example, if the target is
192.168.1.100:8080, your Mac should be able to ping192.168.1.100and connect to192.168.1.100:8080.
Steps to Add a Reverse Proxy Site
Here’s how to configure a reverse proxy site in ServBay:
Step 1: Open the ServBay Management Interface
Locate the ServBay icon in your macOS Applications folder and double-click to launch the app.
Step 2: Navigate to Website Management
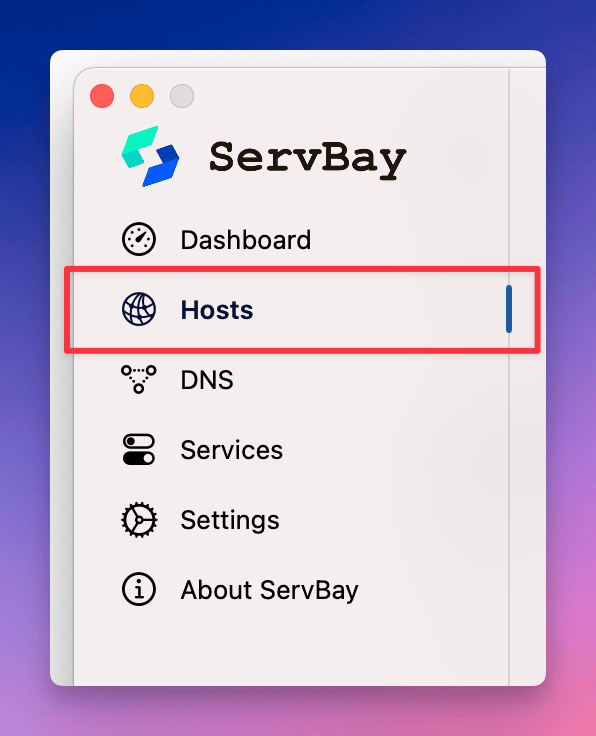
Once ServBay starts, you’ll see the main dashboard. From the navigation menu on the left, click Websites. This takes you to ServBay’s website management page, where you can manage all locally hosted and reverse proxy websites.
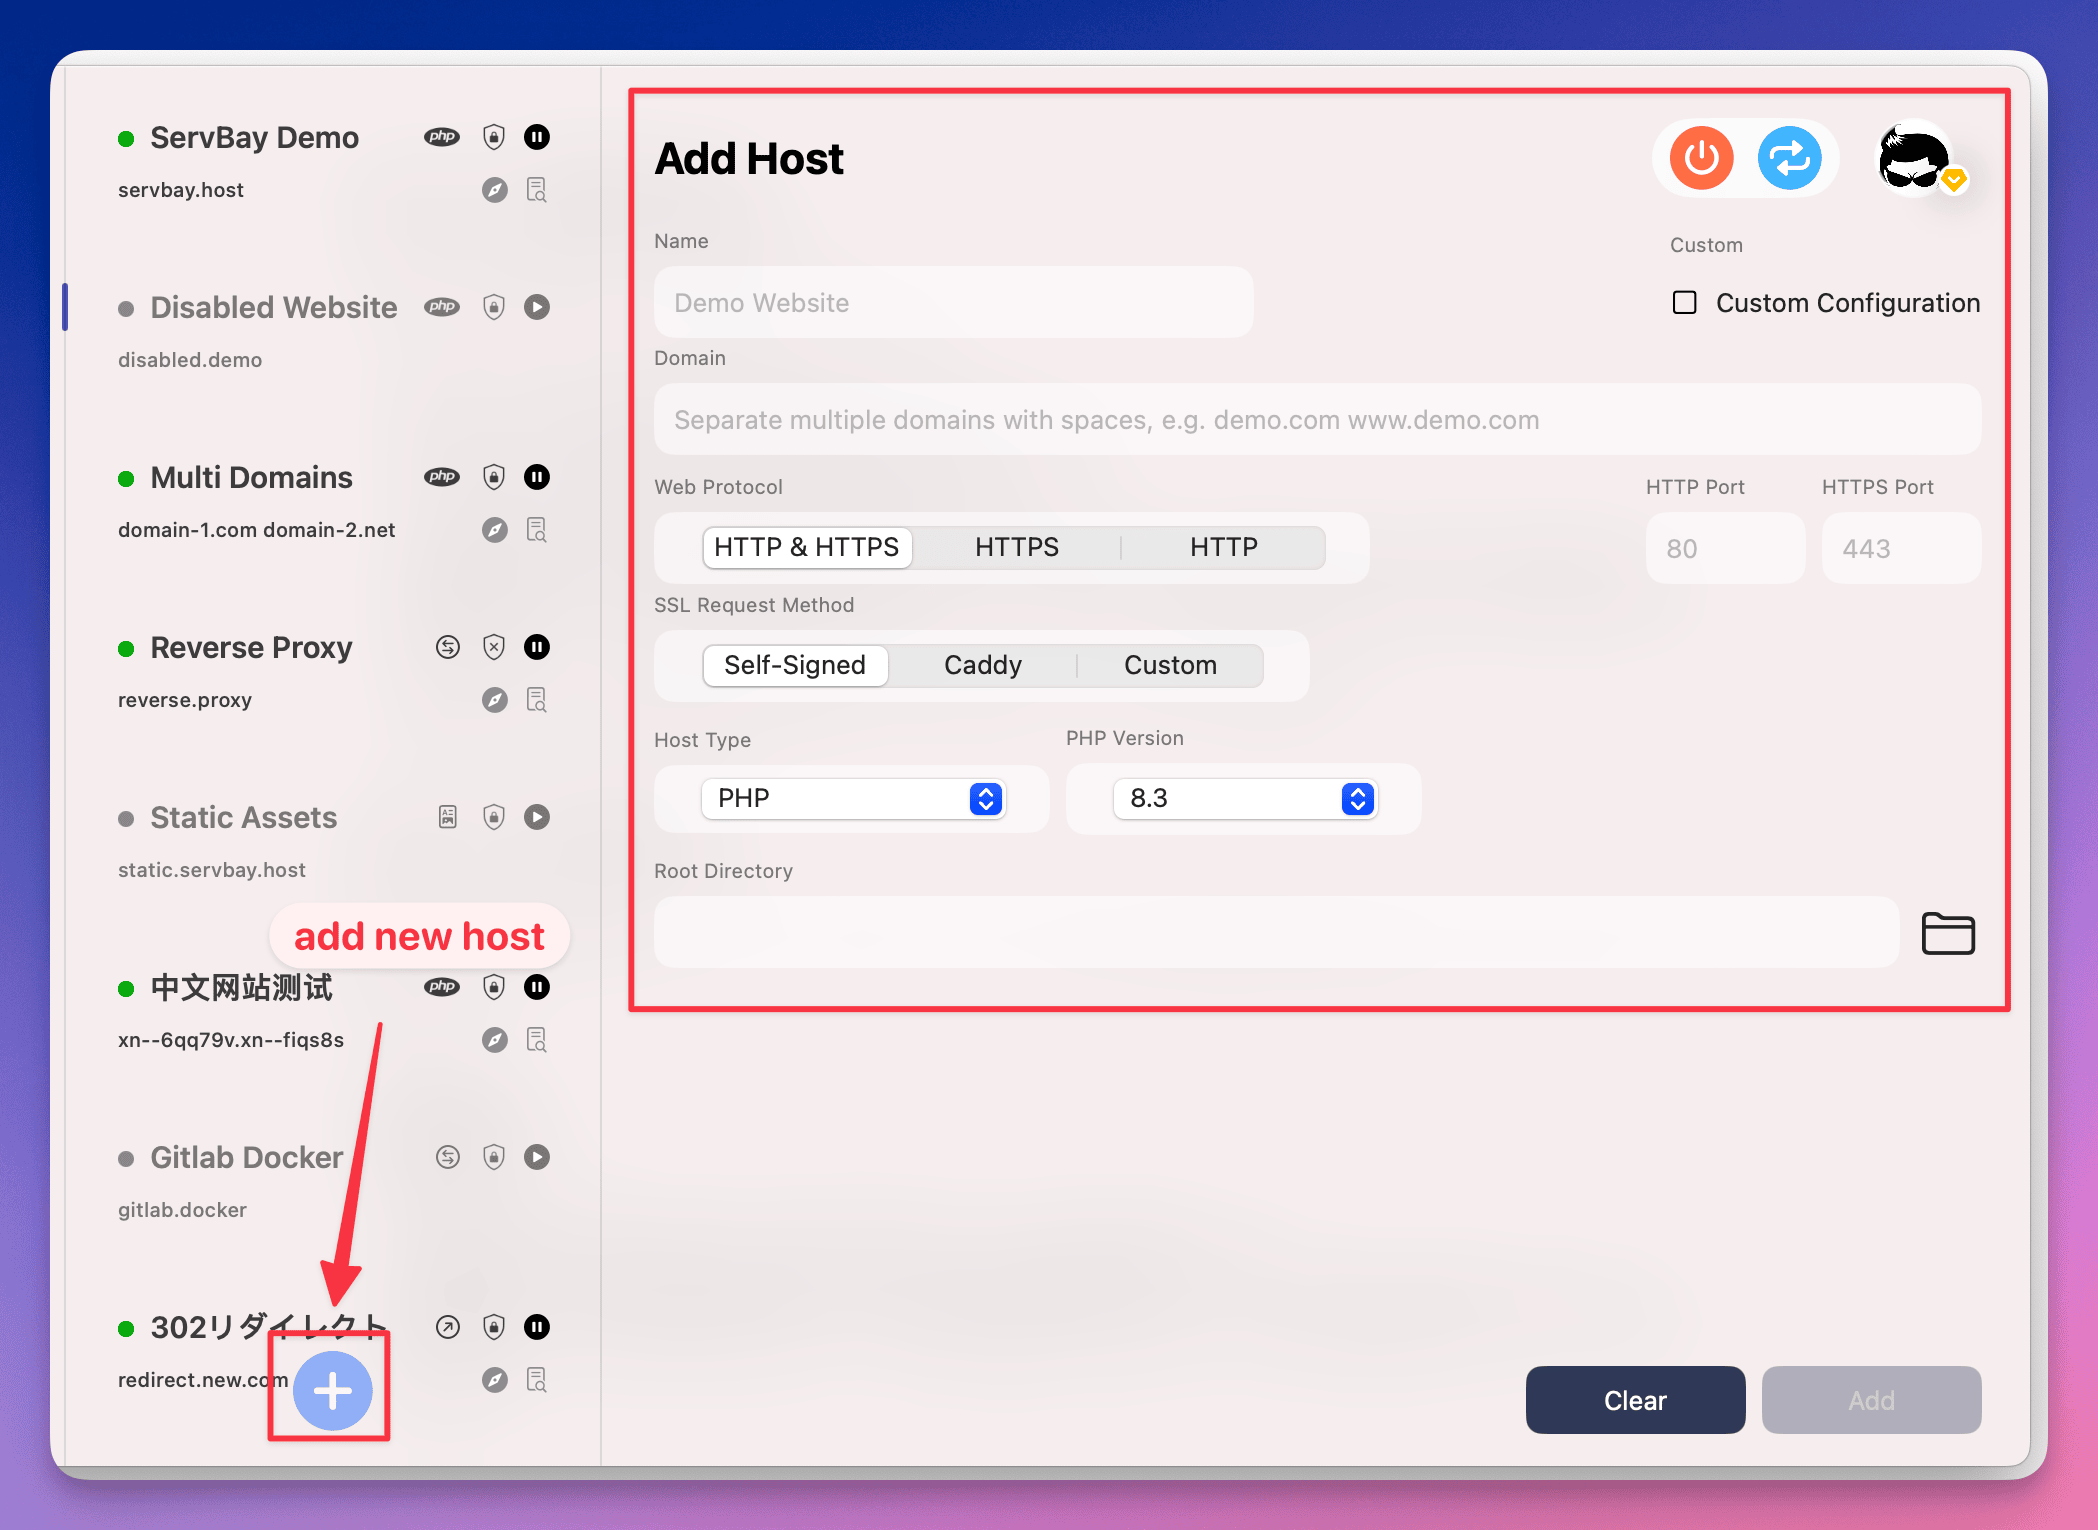
Step 3: Add a New Website
At the bottom of the website management page, find and click the + button. Once clicked, a new form appears on the right side where you can configure a website.
Step 4: Configure Reverse Proxy Settings
On the new website form, fill in the essential details to define the reverse proxy behavior:
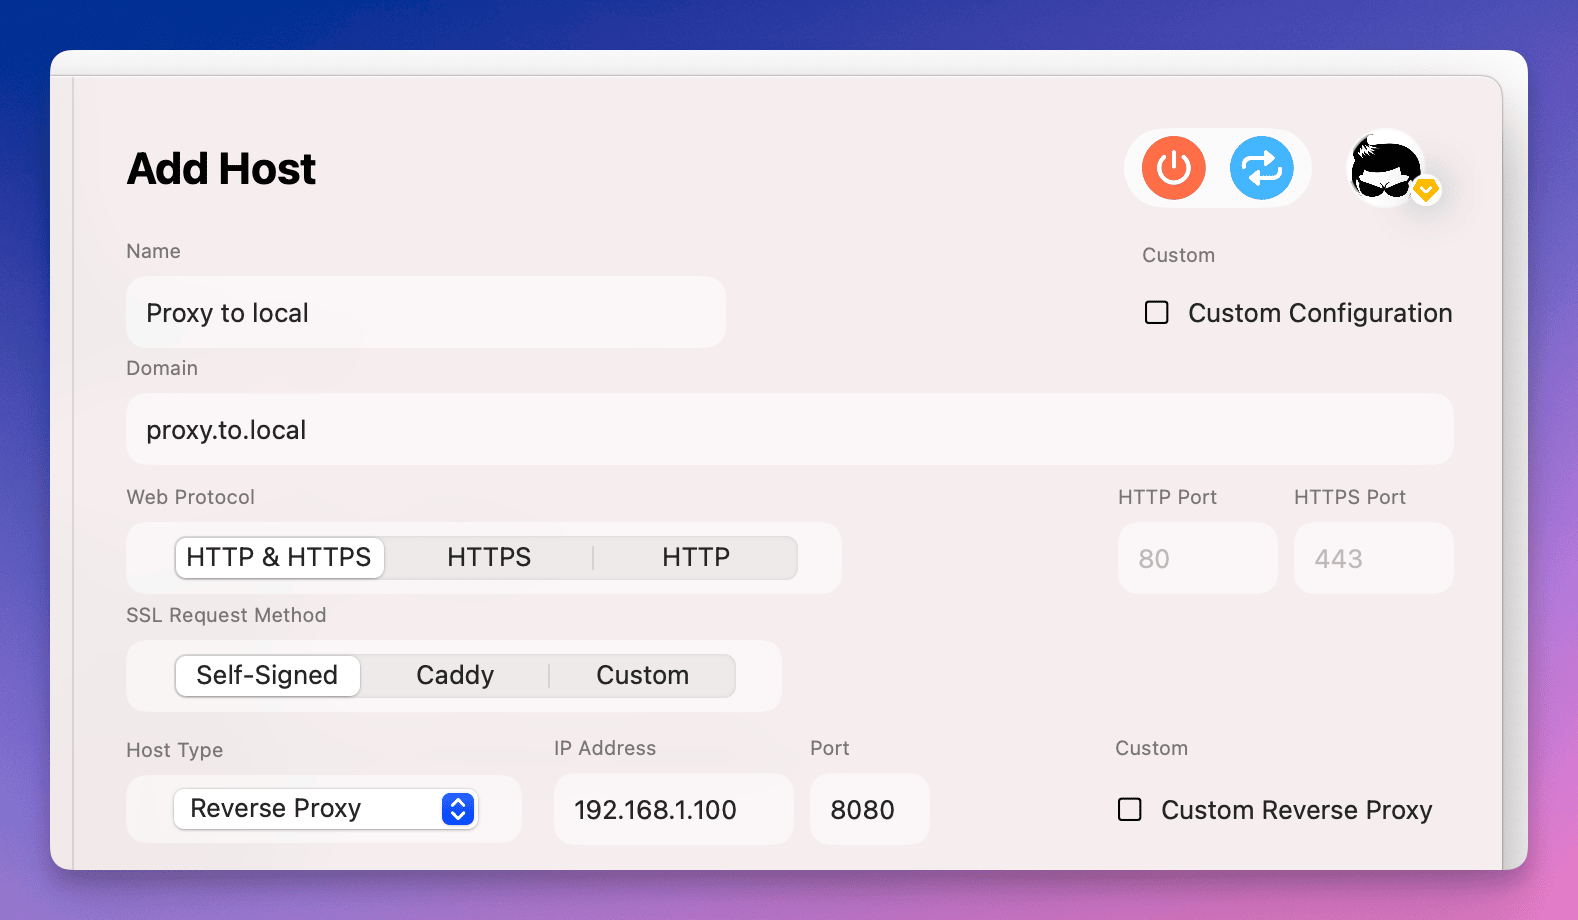
- Name: Give your reverse proxy site an easily recognizable name. Example:
Internal Backend Proxy. - Domain: Enter the domain name you want to use locally for accessing the proxied site, e.g.,
backend.servbay.demoorproxy.to.local. ServBay usually adds the domain to your systemhostsfile automatically so it resolves to127.0.0.1or::1. - Protocol: Select the supported protocol for the site. Usually,
HTTP/HTTPSis chosen to allow both. ServBay will handle SSL as per your settings. - SSL Certificate Request Method:
- ServBay CA (Recommended for Local Development): With this option, ServBay uses its built-in Certificate Authority (CA) to auto-generate and manage SSL certificates for your domain. It’s convenient, but you must trust the ServBay CA root certificate in your browser or system to avoid warnings.
- ACME (Let's Encrypt): If your domain is public and accessible from the internet, opt for this to obtain a free public SSL certificate from Let's Encrypt.
- Manual: If you have existing SSL certificate files (
.crt,.key,.ca-bundle), choose this to upload and configure them manually. For local development and internal resources, it’s strongly recommended to useServBay CA.
- Website Type: Select
Reverse Proxy. This critical setting enables proxy functionality. - Proxy Target: Enter the full address for the site you want to proxy. This may be:
- Example 1 (IP:Port):
192.168.1.100:8080 - Example 2 (Full URL with protocol):
http://192.168.1.100:8080 - Example 3 (Internal Hostname):
backend.internal:8443(ServBay must be able to resolve the hostname) - Example 4 (Remote URL):
https://api.example.comEnsure the address is directly accessible from the ServBay machine.
- Example 1 (IP:Port):
Step 5: Complete & Save Configuration
When all required information is entered, click Add at the bottom of the form. ServBay will automatically save your settings and generate the corresponding reverse proxy rules with its web server (Caddy or Nginx).
Upon successful save, your new reverse proxy site will appear in the site list.
Step 6: Access the Reverse Proxy Site
After configuration, simply enter the chosen domain (such as proxy.to.local or backend.servbay.demo) in your browser to access the proxied internal or remote site.
If you used ServBay CA and selected HTTPS, you may need to address a browser certificate warning on your first access (if you haven’t yet trusted the ServBay CA root certificate).
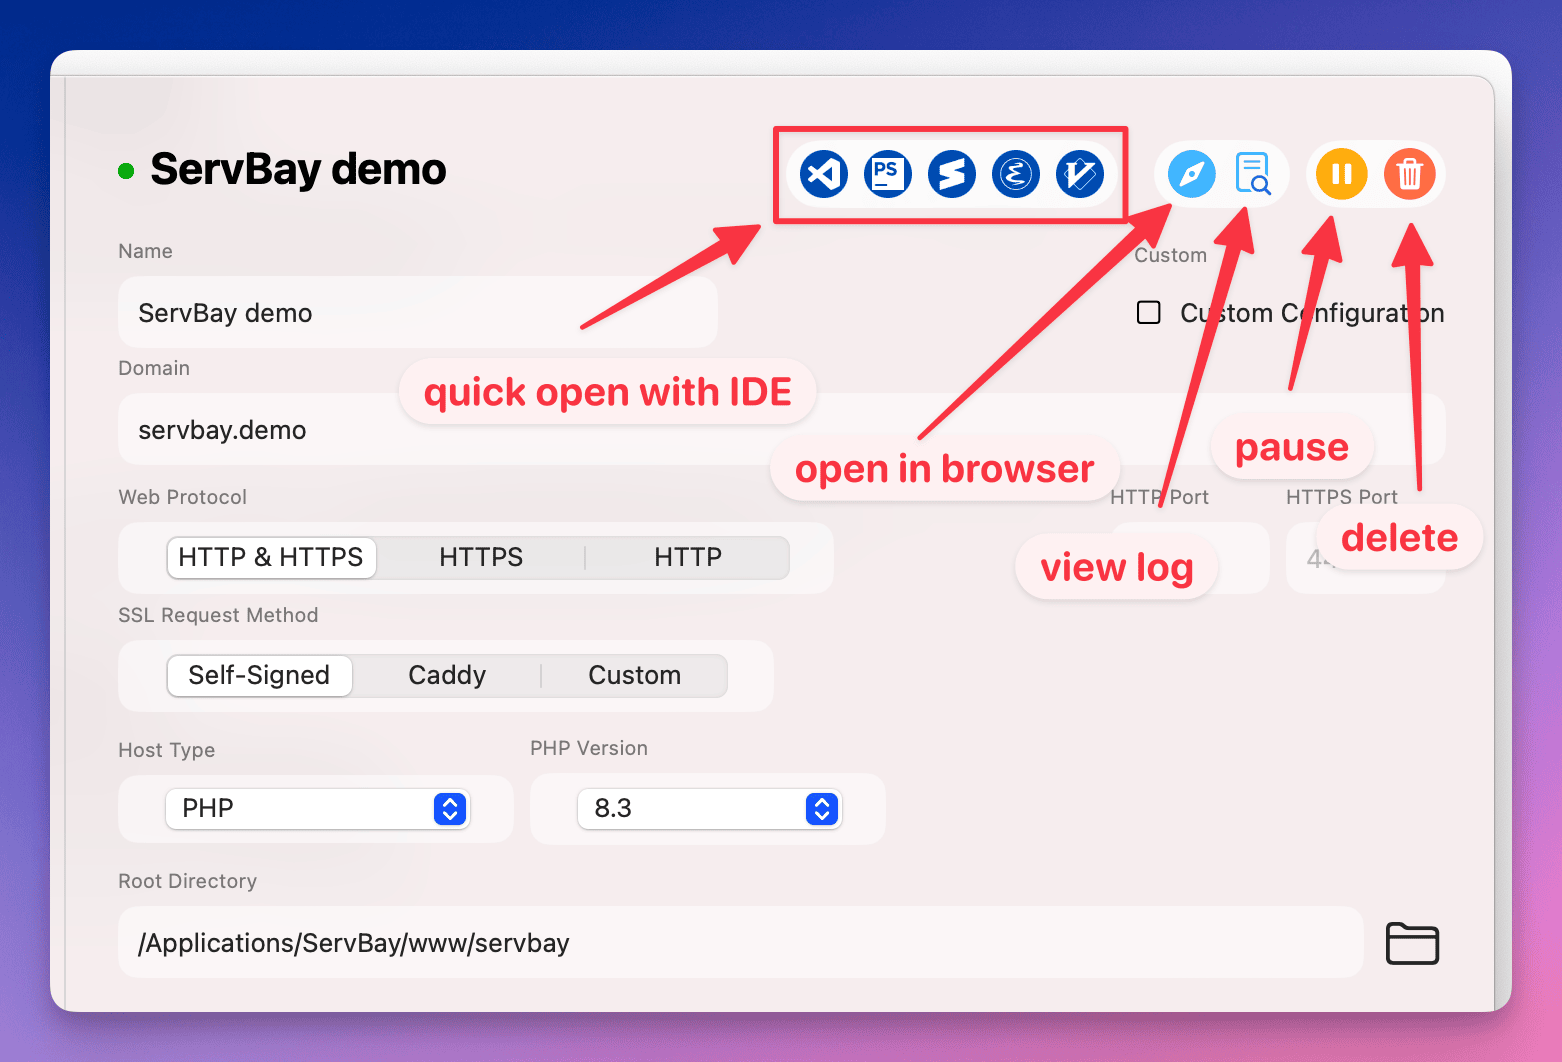
Step 7: Website Quick Actions
ServBay offers convenient quick action buttons for each website:
- Open Root Directory in IDE: Not commonly used for reverse proxy sites, as they don’t have a local root.
- Open Site in Browser: Quickly launch the site in your default browser.
- View Website Logs: Inspect ServBay’s web server (Caddy/Nginx) access and error logs for the site—crucial for debugging.
- Pause/Enable Site: Temporarily switch the reverse proxy on or off.
- Delete Site: Remove the reverse proxy configuration from ServBay.
Frequently Asked Questions (FAQ) & Solutions
Q: Site is unreachable; browser shows an error.
- Check ServBay Status: Confirm ServBay is running and that the web server (Caddy/Nginx) is started.
- Check Domain Resolution: Make sure you enter the correct domain and that it resolves to your local ServBay IP (typically ServBay auto-edits the
hostsfile, but you can check manually). - View ServBay Website Logs: Click on "View Logs" in the site list to inspect the web server logs. These contain client request info, ServBay’s proxy connection attempts, and any errors—your best resource for diagnosing issues.
- Check Firewall/Security Software: Ensure macOS firewall or security apps are not blocking ServBay from listening on ports 80 or 443, or preventing it from connecting to the proxy target address.
Q: The ServBay machine can access the proxy target, but accessing via ServBay domain in the browser gives an error.
- Check Proxy Target Format: Make sure the "Proxy Target" address in ServBay is correct, and the machine can reach it directly. Test connectivity using
curl [proxy target address]in terminal. - Review Backend Server Config: Some back-end servers inspect the
Hostheader. ServBay, by default, forwards the original clientHostheader to the backend. If your backend requires a specificHostvalue (like an internal domain) but you access through a different domain via ServBay, this could cause issues. In ServBay’s advanced settings, you can tweak header forwarding (you may have to manually edit the Caddyfile or Nginx config, which is beyond the basic UI). - Check Target Server Firewall: Sometimes, a target server firewall only allows connections from certain IP ranges (like internal addresses). Make sure it permits connections from the ServBay machine’s IP.
Q: Certificate warning when accessing reverse proxy site via HTTPS.
- Using ServBay CA: With ServBay CA, this is expected since it’s a private CA, not trusted by major browsers by default. Manually trust the ServBay CA root certificate in your OS or browser. Install it from ServBay’s Settings.
- Using ACME (Let's Encrypt): Ensure your domain resolves to the ServBay machine, and you’ve successfully applied for an ACME certificate through ServBay’s SSL management. Review ServBay logs for detailed errors during ACME issuance.
Q: How do I proxy to targets requiring specific headers or cookies?
ServBay’s basic proxy setup forwards most client request info. For more advanced situations—such as adding custom headers, modifying response headers, special cookie handling, or path rewrites—you’ll need to access ServBay’s advanced settings and manually edit the underlying Caddyfile or Nginx config with custom reverse proxy rules. Familiarity with Caddy or Nginx configuration syntax is recommended for these tasks.
Summary
With ServBay’s reverse proxy feature, you can effortlessly integrate web sites from internal networks, virtual machines, containers, or remote servers into your local development workflow. This provides a unified, convenient access point, while simplifying local debugging and SSL configuration. Just follow the steps outlined above to quickly set up and start using reverse proxy sites. Combined with ServBay’s powerful logging and troubleshooting tools, you can ensure your proxied sites run reliably and boost your development productivity.
