
ServBay Documentation: Manage Databases with Adminer
Overview
ServBay is a powerful local web development environment for macOS and Windows, integrating various web servers, language runtimes, and database systems. To simplify database management for developers, ServBay comes pre-installed and configured with Adminer—a robust yet lightweight database management tool. This document will guide you through connecting to and managing databases included with ServBay using Adminer.
What Is Adminer
Adminer is a single-file database management tool written in PHP. It supports multiple database systems, including MySQL, MariaDB, PostgreSQL, SQLite, MongoDB, and more. Compared to more complex database clients, Adminer offers several key advantages:
- Lightweight and Single File Deployment: Adminer consists of just one PHP file, with no complicated installation required. ServBay has integrated Adminer for immediate use.
- Multi-Database Support: Manage different types of databases from a unified interface, saving you from installing and learning multiple separate tools.
- Simple and User-Friendly Interface: Its clear layout makes navigation easy; even first-time users can get started quickly.
- Comprehensive Features: Supports almost all common database operations, such as creating, modifying, and deleting databases, tables, indexes, users, running SQL queries, and importing/exporting data.
For developers working locally with ServBay, Adminer offers an efficient and convenient database management solution.
Accessing Adminer
Once ServBay is running, Adminer is automatically available via ServBay's built-in web server. Access it by navigating to ServBay's default local domain and appending the Adminer filename:
https://servbay.host/adminer.php
Make sure the ServBay application is running, and that both your chosen web server (e.g., Caddy or Nginx) and the database service you wish to connect to are started.
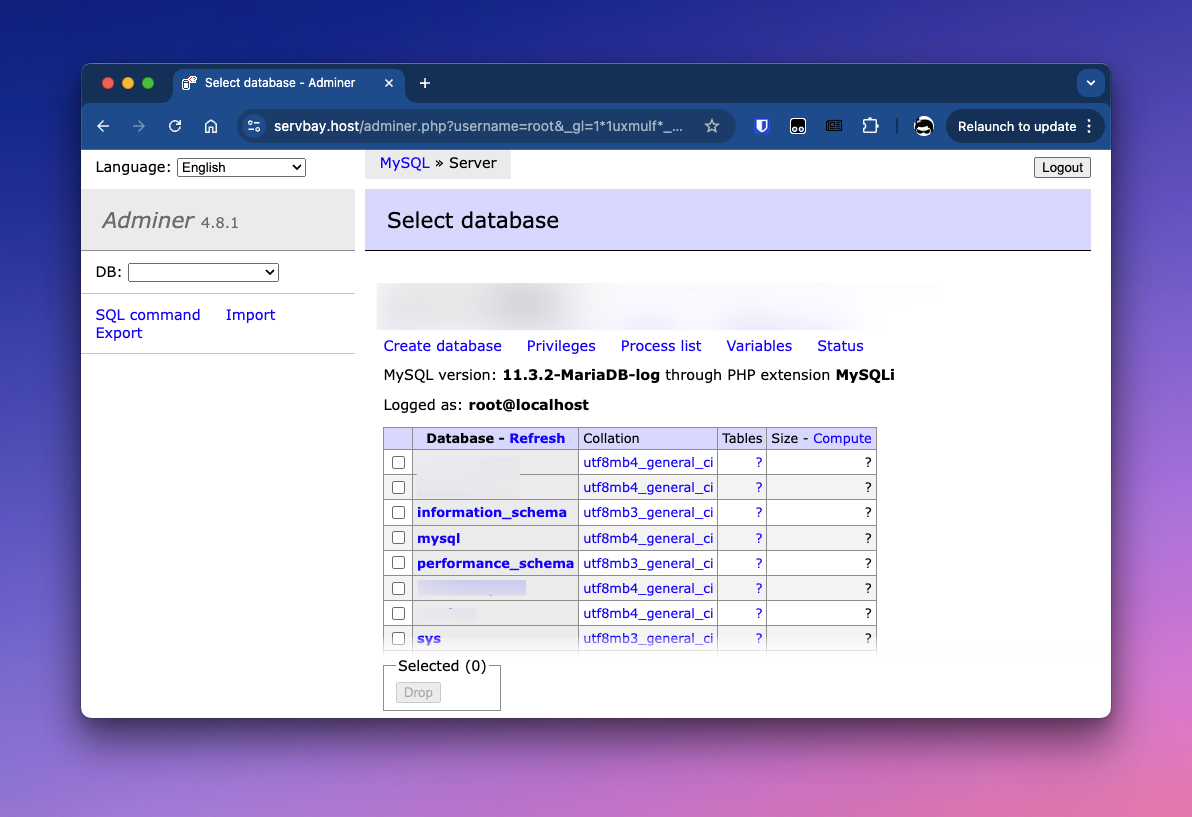
Connecting to Databases in ServBay
Adminer's login interface is straightforward. Select the database type and provide the server address, username, password, and—for some databases—the database name. ServBay auto-generates default usernames and passwords for built-in databases, which you can find in the "Database" tab of the ServBay app.
Connect to MariaDB / MySQL
ServBay typically includes MariaDB or MySQL by default. In Adminer, choose "MySQL" as the system type.
- Open your browser and navigate to the Adminer URL (
https://servbay.host/adminer.php). - In the login screen, select
MySQLfrom the System dropdown menu. - Enter the server connection details:
- Server: Enter
localhostor use ServBay’s Unix Socket path/Applications/ServBay/tmp/mysql.sock. Socket connections are usually more efficient. - Username: Find the MariaDB/MySQL username in the ServBay app under "Database."
- Password: Find the MariaDB/MySQL password likewise.
- Database: (Optional) Enter a specific database name to connect directly, or leave blank to manage all databases after login.
- Server: Enter
- Click the
Loginbutton.
Connect to PostgreSQL
ServBay also supports PostgreSQL. In Adminer, select "PostgreSQL" as the system type.
- Open your browser and go to the Adminer URL (
https://servbay.host/adminer.php). - In the login screen, select
PostgreSQLfrom the System dropdown. - Enter the server details:
- Server: Input
/Applications/ServBay/tmp. - Username: Find the PostgreSQL username in ServBay's "Database" tab.
- Password: Find the PostgreSQL password accordingly.
- Database: Enter the database name, such as the default
postgresdatabase or any other you've created.
- Server: Input
- Click the
Loginbutton.
Connect to SQLite 3
ServBay supports SQLite 3 databases, which are represented by files. When connecting, provide the path to your database file.
- Open your browser and visit the Adminer URL (
https://servbay.host/adminer.php). - In the login screen, select
SQLite 3from the System dropdown. - Enter the database file path:
- Database File: Specify the full path to your SQLite database file. It's recommended to store SQLite database files inside ServBay’s data directory, e.g.
/Applications/ServBay/db/sqlite/your_database_name.sqlite. - If the specified file does not exist, Adminer will prompt you to create a new database file.
- Database File: Specify the full path to your SQLite database file. It's recommended to store SQLite database files inside ServBay’s data directory, e.g.
- Click the
Loginbutton.
Common Database Operations
After logging into your database server or a specific database, you can perform a variety of management tasks using Adminer’s interface. The available functions may differ slightly across database types, but the general workflow is similar.
Create a Database
(Applicable to MariaDB/MySQL, PostgreSQL)
- Log in to the database server (without specifying a database).
- Find the
Create Databaseoption in the sidebar or main interface. - Enter a name for the new database.
- Select character set and collation (if needed).
- Click
SaveorCreate.
(For SQLite 3, creating a database is done by specifying a non-existent file path at login.)
Manage Tables and Data
- Select a database (if not specified at login).
- In the database overview page, choose
Create Table. - Enter the table name and define fields (columns), including field names, data types, lengths, NULL allowance, default values, and indexes (primary key, unique index, normal index).
- Click
Saveto create the table. - After creating, pick the table from the sidebar or summary page.
- Perform data operations:
Insert: Add new rows.Select: View, search, sort, and filter existing data.Update: Modify existing rows.Delete: Remove existing rows.- Use
SQL Commandfor more advanced queries and actions.
Run SQL Commands
Adminer has a SQL command input area, allowing you to execute custom SQL statements for flexible database management and querying.
- Select the database for your commands.
- Click the
SQL Commandoption. - Input your SQL statements in the text area.
- Click
Execute.
Import and Export Data
Adminer can export database structures and data as SQL files or other formats (like CSV), and import data likewise—a useful feature for migrations, backups, or sharing data with others.
- Select the database or table for import/export.
- Locate the
ExportorImportoption. - Follow the prompts to pick format and settings, then run the operation.
Delete a Database
(Applicable to MariaDB/MySQL, PostgreSQL)
- Log in to the database server (not a specific database).
- Select the database to delete from the list.
- Click the
Deleteoption and confirm. Caution: This operation is irreversible and will permanently delete the database and all its data.
(For SQLite 3, deleting the database means removing the .sqlite file manually from the file system.)
Important Notes
- Credential Security: Keep the database usernames and passwords obtained from ServBay settings secure and do not share them.
- ServBay Running Status: Adminer is accessed via ServBay’s built-in web server and requires the corresponding database service to be running. If you can't access Adminer or connect to a database, check if the ServBay application is active and that required packages (Caddy/Nginx, MariaDB/MySQL, PostgreSQL, etc.) are started.
- SQLite File Paths: Make sure that your SQLite database files are stored in a location where the ServBay user has read/write permissions—preferably in
/Applications/ServBay/db/sqlite/. - Performance: Adminer is lightweight and best suited for regular-sized databases and routine management tasks. For very large or complex databases, specialized desktop clients (TablePlus, DBeaver, pgAdmin, etc.) may offer advanced features and better performance.
Frequently Asked Questions (FAQ)
Q: I cannot access https://servbay.host/adminer.php. What should I do?
A: Ensure that the ServBay application is running and that its web server (usually Caddy or Nginx) is started. Check whether your browser can reach https://servbay.host.
Q: I forgot my database username or password. Where can I find them?
A: In the ServBay app’s interface, check the "Database" tab for the default usernames and passwords for each database.
Q: What are the server address and port for connecting to PostgreSQL?
A: By default, use localhost as the server address and port 5432. You can confirm the listening address and port in ServBay's settings. For Unix Domain Socket connections, use /Applications/ServBay/tmp (Note: PostgreSQL does not require the .sock suffix).
Q: What’s the difference between server address and socket path when connecting to MariaDB/MySQL?
A: localhost connects via TCP/IP (default port 3306), while /Applications/ServBay/tmp/mysql.sock uses a Unix Domain Socket. For local development, socket connections are generally faster and safer. You can choose the method that best fits your needs.
Q: Can I use Adminer to manage databases not included with ServBay?
A: Adminer supports many database types by itself. If you’ve installed other databases externally (e.g., standalone MongoDB or remote databases), you can attempt connecting to them using the Adminer file inside ServBay—provided you have the correct network access and credentials. However, Adminer’s greatest value is in managing ServBay’s built-in databases.
Conclusion
Adminer, included with ServBay, is a highly convenient database management tool. Its single-file, lightweight design and multi-database support make managing MariaDB/MySQL, PostgreSQL, and SQLite databases in a local development environment much easier. Guided by this document, you should be able to connect to ServBay’s databases and use Adminer for your daily database management and data operations with ease.
