
Adding a Node.js Website in ServBay via Reverse Proxy
ServBay is a comprehensive local web development environment with native support for multiple tech stacks, including Node.js. This article provides a detailed guide on how to integrate your independently running Node.js applications into ServBay's website management system via the reverse proxy feature. By doing so, you can conveniently use ServBay’s unified access point (such as custom domains and SSL certificates) to access and manage your Node.js development projects.
Overview
Although ServBay allows you to run Node.js applications directly (e.g., by installing Node.js via ServBay’s packages and running scripts), integrating a Node.js application already listening on a specific port into ServBay as a website with reverse proxy is a common and flexible method. This enables you to leverage ServBay’s powerful networking capabilities (like domain name resolution and SSL/TLS termination) to manage access to your Node.js apps. This guide will walk you through the configuration process.
Prerequisites
Before you start, ensure that:
- ServBay is successfully installed on your macOS system.
- Your Node.js project is running locally and listening on a specific port (e.g.,
8585).
Steps
Step 1: Run Your Node.js Project
First, make sure your Node.js project is running locally and listening on the specified port. Start your Node.js application using your preferred method.
Suppose you're running a Vue.js project's development server on port 8585:
bash
$ npm run dev -- --port 8585
Server running at http://localhost:8585/Note the IP address (usually 127.0.0.1) and port that your Node.js application is listening on.
Step 2: Open ServBay Management Interface
Locate the ServBay icon in your macOS Applications directory and double-click it to launch the ServBay app.
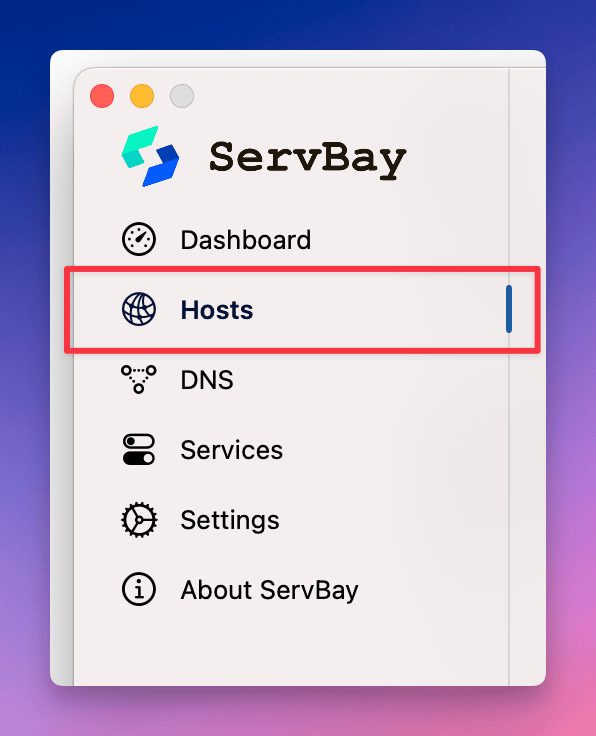
Step 3: Navigate to Website Management
Once ServBay is open, you’ll see its main interface. On the left navigation menu, click on Websites. This will take you to the site management page, where you can manage all sites hosted or proxied through ServBay.
Step 4: Add a New Website
At the bottom of the website management page, locate and click the + button. This will open a form area for you to enter the configuration details for the new website.
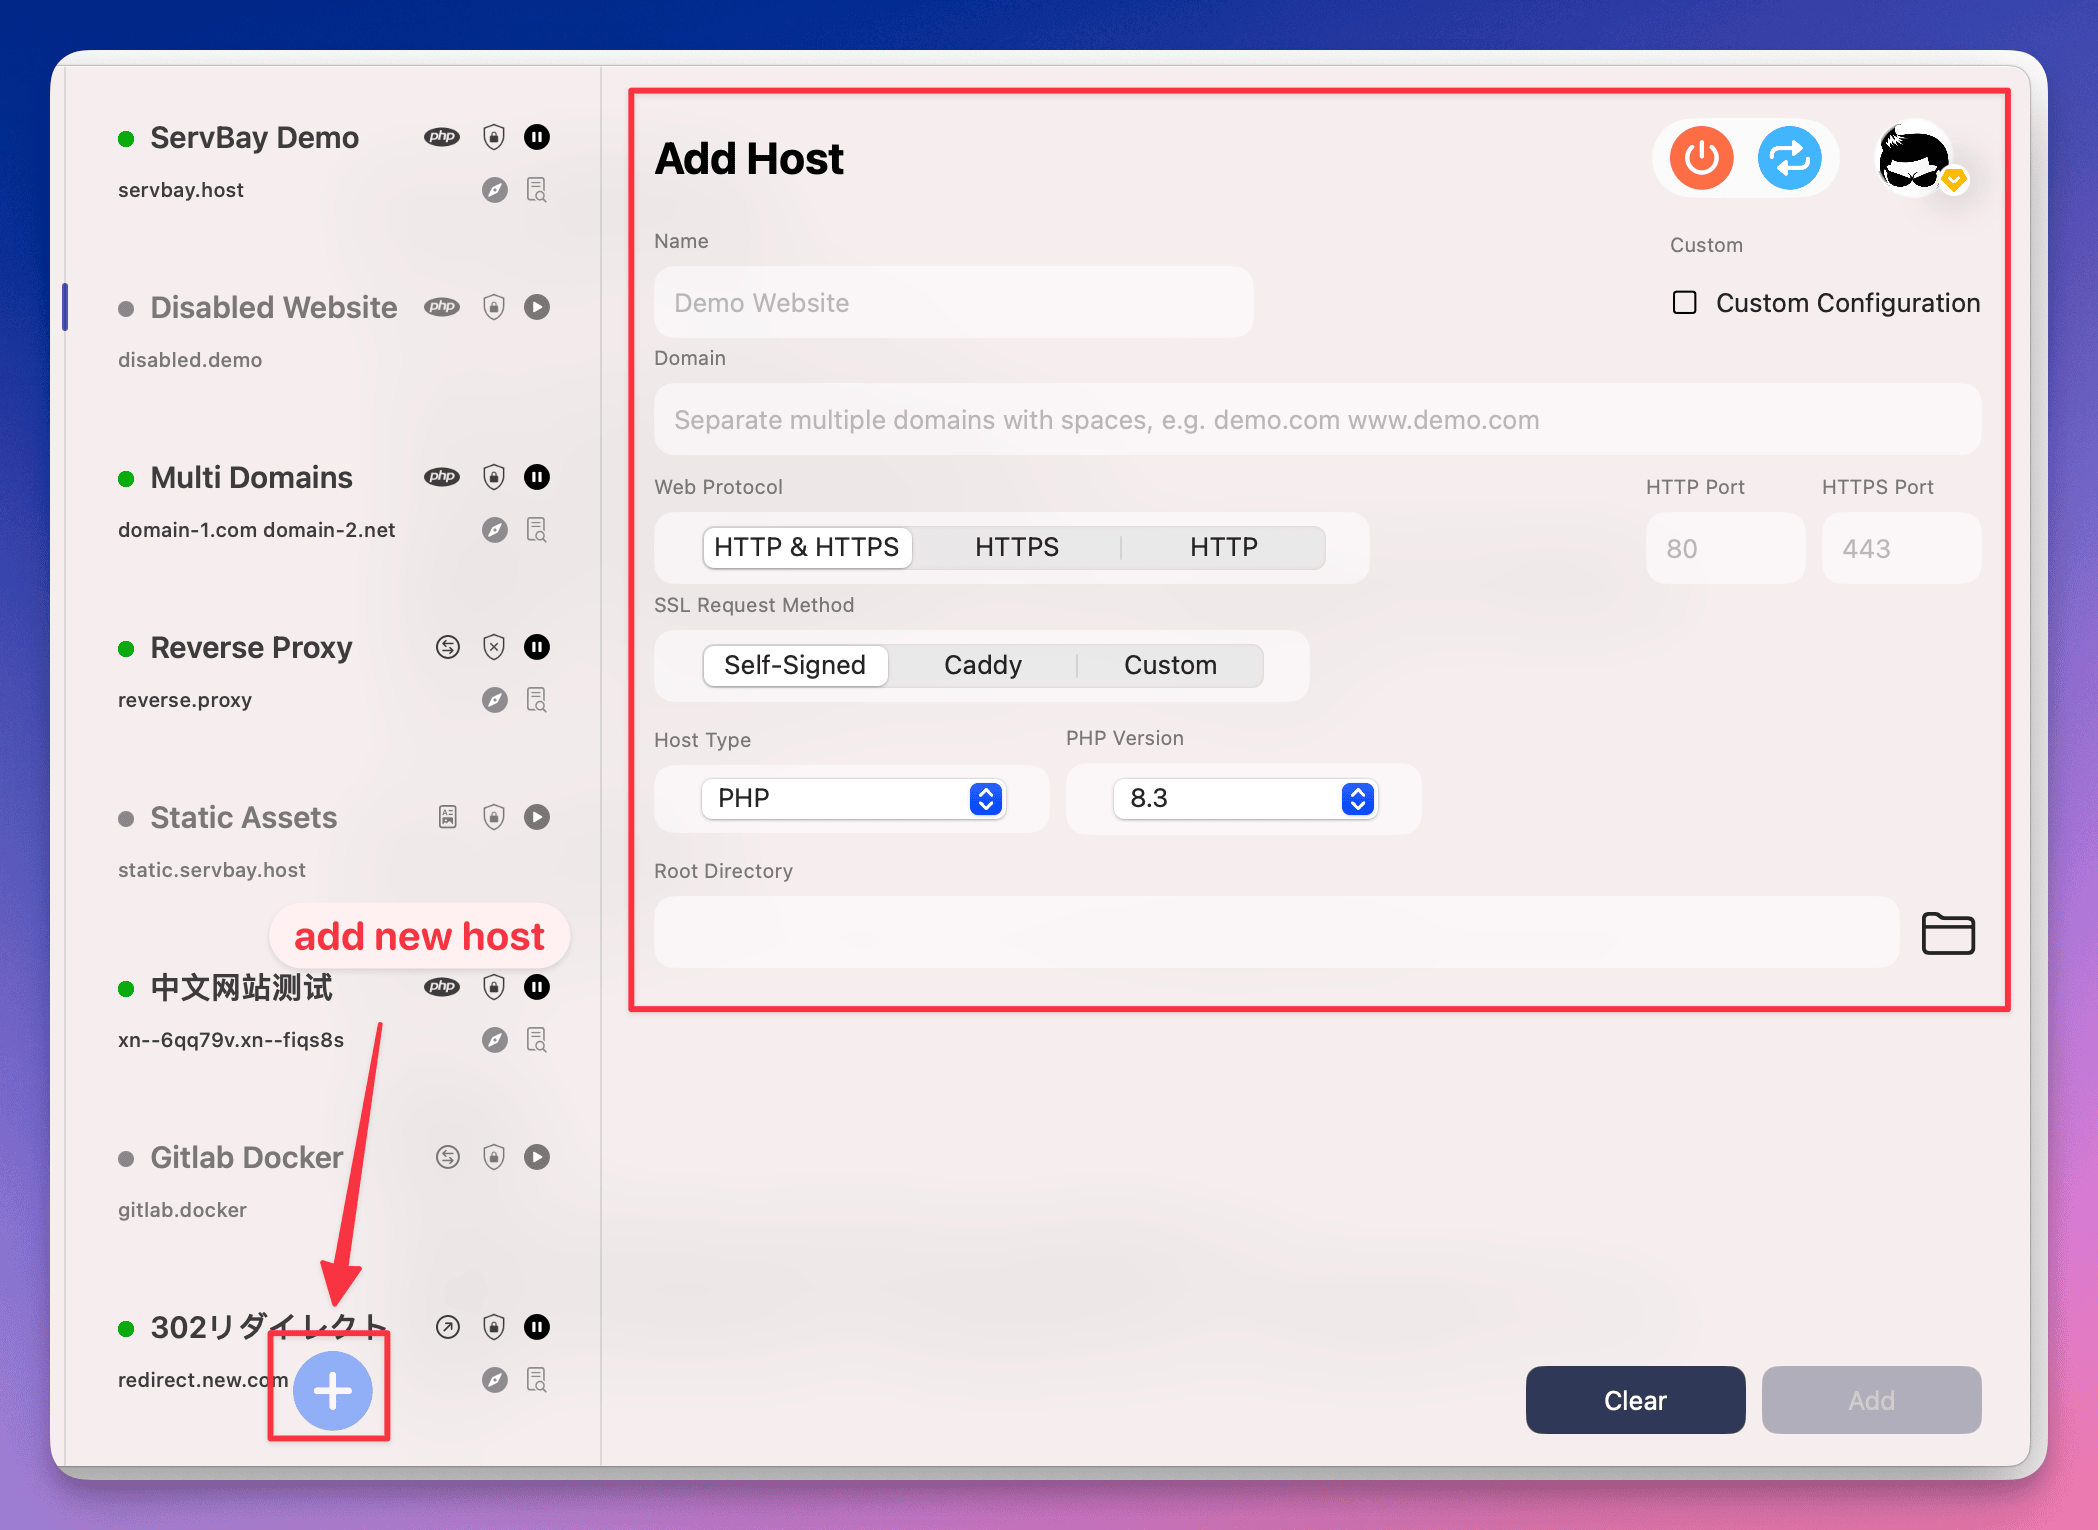
Step 5: Configure Website Settings
Within the form for adding a new website, enter the following key information to set up the reverse proxy:
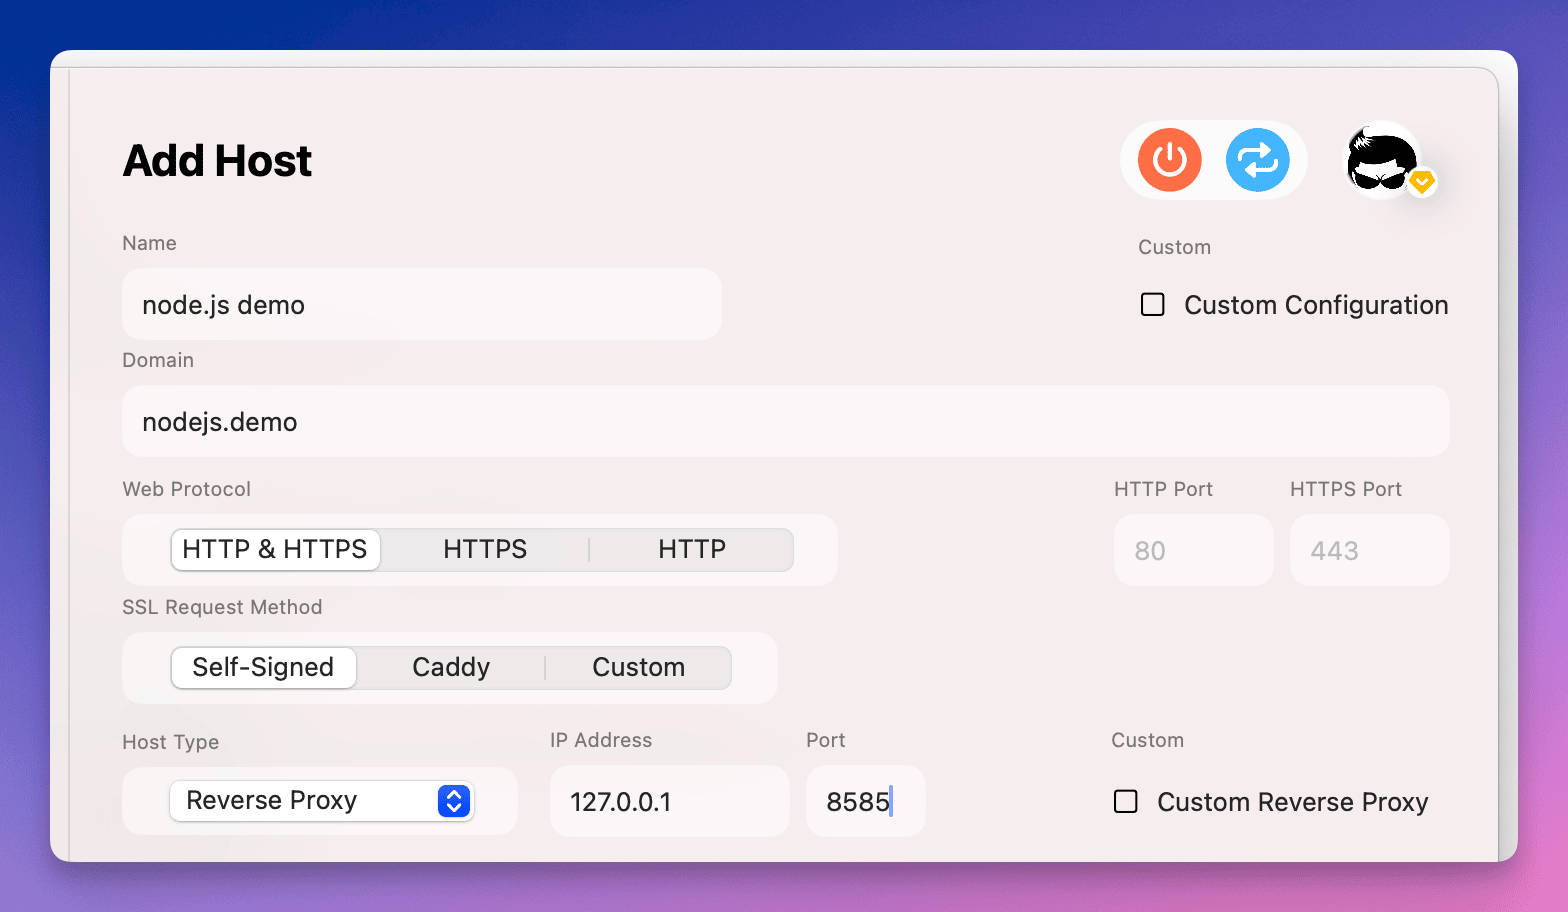
- Name: Assign an easily recognizable name for your site, such as
My Node.js App. This is just for display in the ServBay interface. - Domain: Enter the local domain you wish to use to access your Node.js app in the browser. It's recommended to use ServBay’s suggested
.servbay.demosuffix, e.g.,nodejs.servbay.demo. ServBay will automatically set up local DNS to point to127.0.0.1. - Protocol: Choose which protocols the site should support. Usually, the default
HTTP/HTTPSis sufficient. ServBay will listen on both HTTP and HTTPS ports. - SSL Certificate Method: For local development, it’s strongly recommended to select
ServBay CA. ServBay will automatically generate and install an SSL certificate signed by the ServBay root CA. After installing ServBay’s root certificate into your system and browser, you won’t see certificate warnings when accessing the HTTPS version of this site. You may also chooseServBay Public CAorACME(for publicly trusted certificates); however, these are usually used for external access scenarios. - Site Type: Be sure to select
Reverse Proxy. This tells ServBay to forward all requests for this domain to another location instead of serving files directly from the file system. - IP Address: Enter the IP address your Node.js app is listening on. For local apps, this is typically
127.0.0.1(the localhost address). - Port: Enter the port your Node.js app is listening on, such as
8585. ServBay will forward incoming requests to127.0.0.1:8585.
Step 6: Complete and Save
Once all required configurations are filled out, click the Add button at the bottom of the form. ServBay will save your settings and automatically update its internal configuration (such as web server and DNS settings).
After saving successfully, you’ll see a new entry for nodejs.servbay.demo in the ServBay website list. At this point, you should be able to access your Node.js application via the domain you set up (e.g., http://nodejs.servbay.demo or https://nodejs.servbay.demo). You can quickly open the site by clicking the browser icon next to the entry.
Step 7: Quick Actions
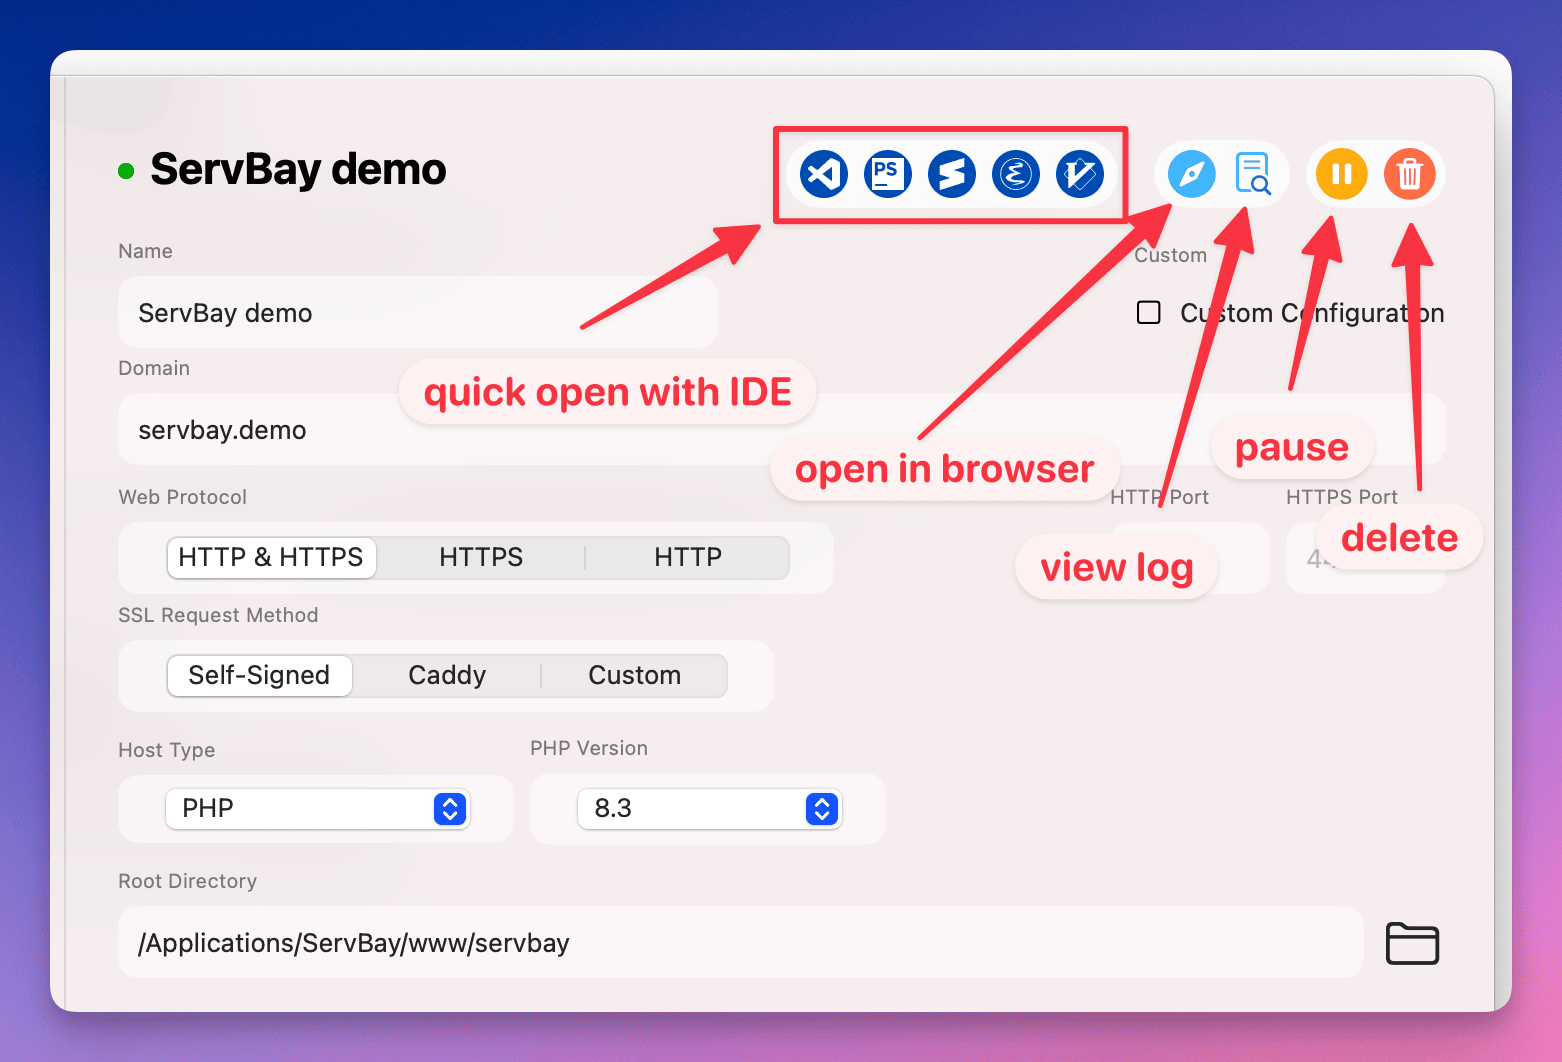
ServBay offers a set of convenient quick action buttons for each website, located on the right side of the website list:
- Open Site Root in IDE: For reverse proxy sites, this button might not take you directly to your Node.js project directory, but to ServBay’s default website root,
/Applications/ServBay/www, or another configured directory. - Open Website in Browser: Instantly open the site URL in your default browser.
- View Site Logs: See access and error logs generated by ServBay's web server (such as Caddy or Nginx) for this site. This is useful for debugging.
- Pause/Enable Site: Temporarily disable or re-enable access to the site.
- Delete Site: Remove this site configuration from ServBay.
FAQ
- Seeing the ServBay default page or an error when accessing the domain?
- Make sure your Node.js app is running on the correct IP address and port.
- Double-check that the IP and port set in ServBay website configuration exactly match your Node.js app's.
- Confirm that ServBay itself is running.
- If you’re using a
.servbay.demodomain, ensure the ServBay DNS service is running and your system network settings allow ServBay to take over resolution for.servbay.demo.
- Getting certificate warnings when accessing via HTTPS?
- If you selected
ServBay CA, make sure you’ve installed and trusted ServBay’s root certificate in your system and browser. ServBay provides a convenient installation entry. - If you chose
ServBay Public CAorACME, verify that the certificate has been successfully issued and correctly configured.
- If you selected
Summary
With its reverse proxy feature, ServBay provides a flexible way to integrate and manage locally running Node.js applications. You can leverage ServBay’s robust web server capabilities (such as custom domain names and automated SSL certificate management) to offer a unified access point and streamlined management for your Node.js development projects. By following the steps in this guide, you can easily set up and access your Node.js website in the ServBay environment.
