
Managing Local DNS Records
Managing local DNS records is a common requirement during web development, testing, and debugging. This allows you to access local applications using custom domain names (such as servbay.demo) without manually editing your system’s /etc/hosts file. ServBay integrates a local dnsmasq server and provides a user-friendly interface to manage these records, making it easier than ever to add, modify, pause, and delete local DNS records. This guide explains how to use ServBay’s DNS features to configure and control your local domain resolution.
dnsmasq is a lightweight DNS and DHCP server, widely used for small networks and local development environments, enabling efficient handling of local DNS queries. ServBay leverages dnsmasq to deliver a convenient solution for managing local domain name resolution.
TIP
For sites added through ServBay’s Sites feature (for example, projects created via "Add Site"), you’ll see a small globe 🌐 icon to the right of their DNS records in the list. These records are tightly linked to the Sites configuration and must be managed there (such as editing the domain or IP address). They cannot be modified or deleted directly from this DNS records interface. This section manages only DNS records that are manually added and not tied to any specific ServBay Site configuration.
Viewing Current Local DNS Records
With ServBay, you can easily view all currently configured local DNS records. Built-in dnsmasq handles these records, making DNS management transparent and convenient.
Steps to View Records
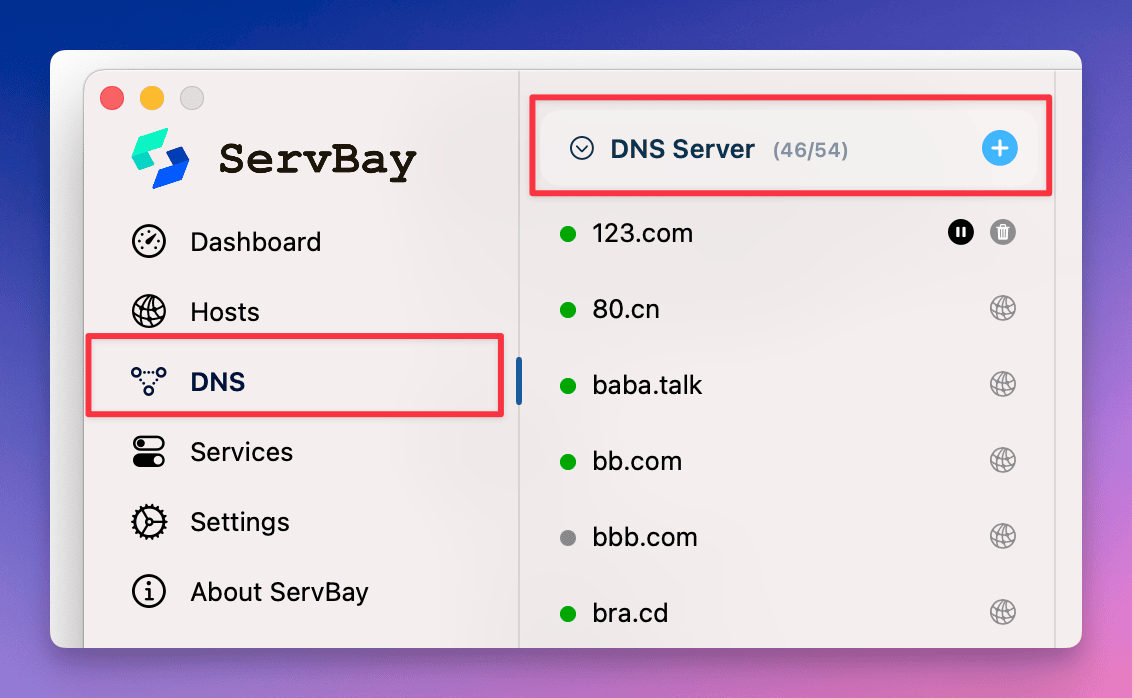
- Open the ServBay management interface.
- Navigate to the
DNSoption in the left-hand menu. - On the right, select
DNS Server. - ServBay will display a list of all configured local DNS records.
This screen allows you to clearly see all configured domain and IP address mappings, as well as the status of each record (enabled/paused).
Adding a Local DNS Record
During development or testing, you may need to map a custom domain to a specific IP address (often 127.0.0.1 or a local network IP). ServBay lets you quickly add a new local DNS record with ease.
Steps to Add a Record
- Open the ServBay management interface.
- Navigate to the
DNSoption in the left-hand menu. - On the right, select
DNS Server. - Click the
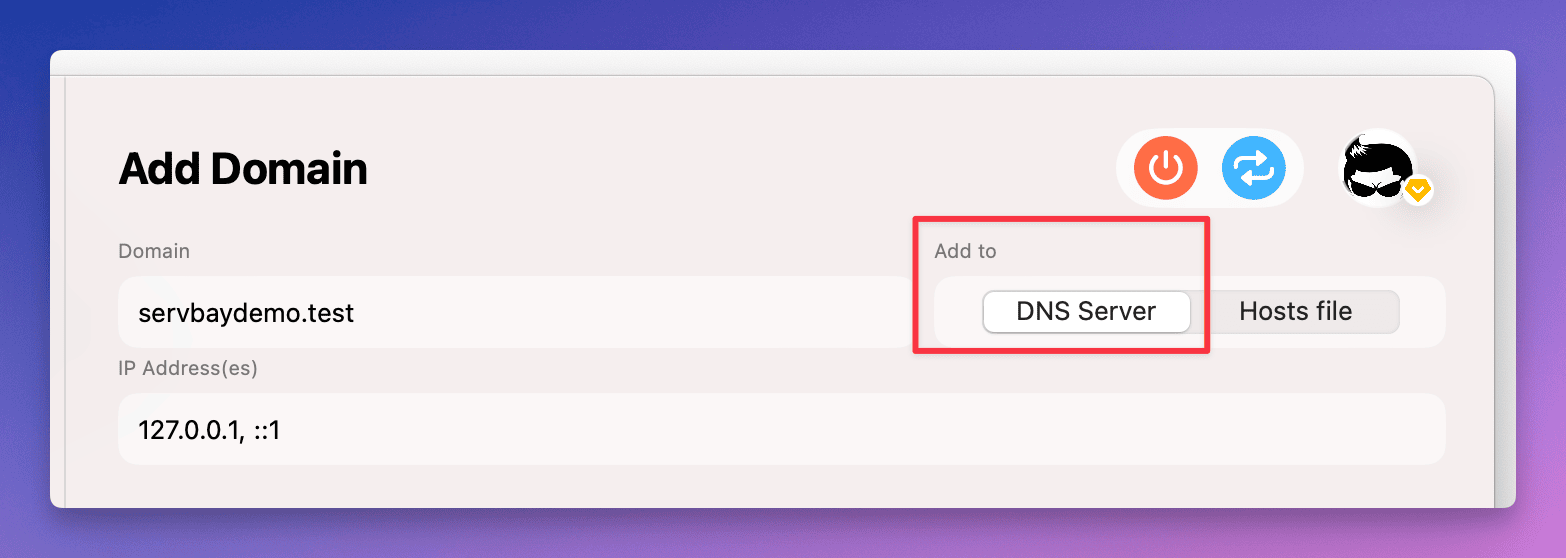
+button at the top of the list. - In the dialog that appears, enter the desired domain and corresponding IP address. For example, map
servbay.demoto local loopback addresses127.0.0.1, ::1 - Click the
Addbutton.
The new domain and IP mapping will be added to your local DNS records and take effect immediately (you may need to clear your browser's DNS cache or refresh).
TIP
ServBay supports adding multiple IP addresses for the same domain, including IPv6 addresses. Separate multiple IPs using a comma (,), such as: 127.0.0.1, ::1
Editing a Local DNS Record
Sometimes, you need to change an existing domain-to-IP mapping, such as when your app moves to a different local IP. ServBay makes it easy to edit local DNS records.
Steps to Edit a Record
- Open the ServBay management interface.
- Navigate to the
DNSoption in the left-hand menu. - On the right, select
DNS Server. - Find the record you want to edit and click on it.
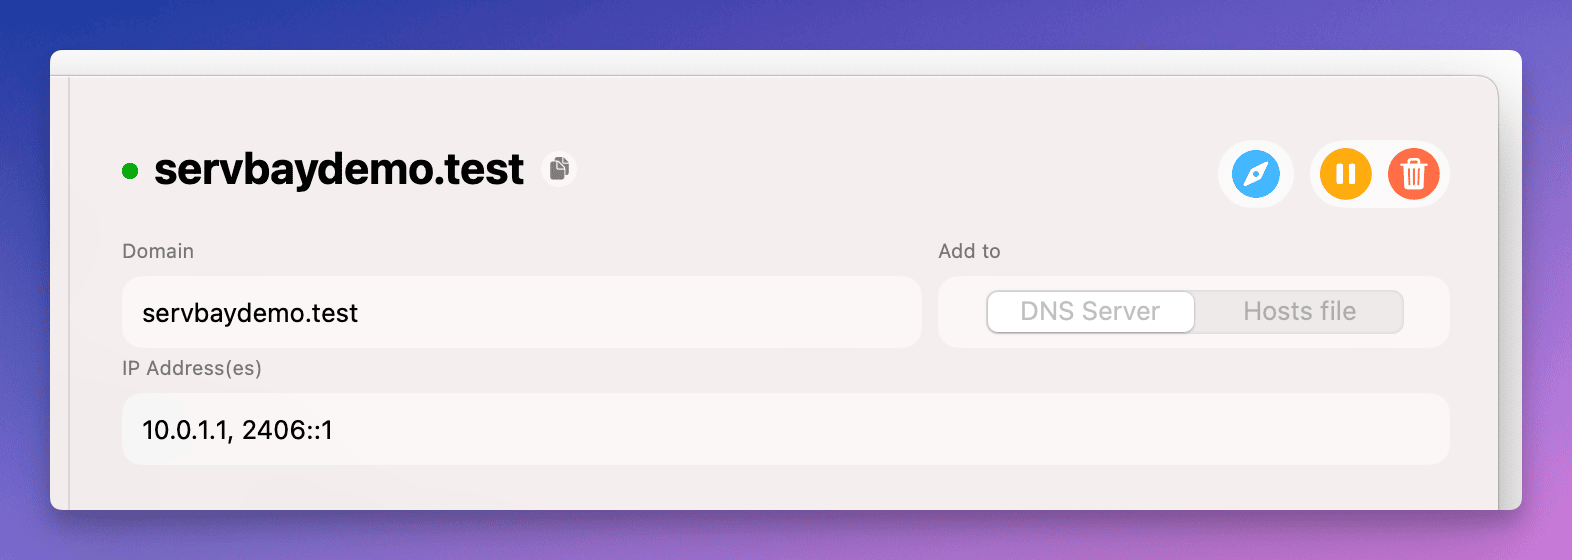
- In the edit panel that pops up on the right, modify the domain or IP address. For example, change the IP for
servbay.demofrom127.0.0.1to10.0.1.1, 2606::1 - When done, click the
Savebutton.
The selected local DNS record will be updated, and the domain will resolve to the new IP address.
Pausing a Local DNS Record
In certain cases, you may want to temporarily disable the resolution of a DNS record—for example, when pausing a project’s development but not wanting to delete its configuration. ServBay allows you to easily pause the DNS record without removing it.
Steps to Pause a Record
- Open the ServBay management interface.
- Navigate to the
DNSoption in the left-hand menu. - On the right, select
DNS Server. - Locate the record you want to pause.
- Click the
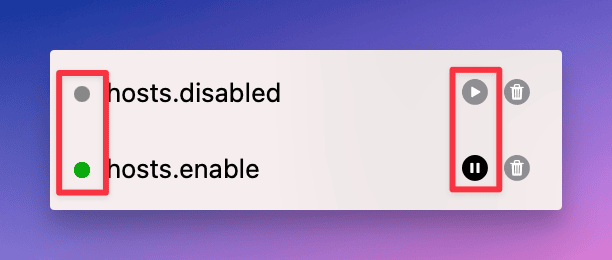
Pausebutton (usually a square icon) to the right of the record.
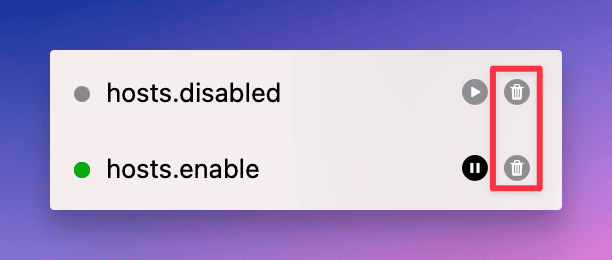
ServBay will automatically pause DNS resolution for that entry. In the record list, its icon will change from green (active) to gray (paused), indicating that this record is currently inactive.
Deleting a Local DNS Record
If a local DNS record is no longer needed, you can permanently delete it from the list using ServBay.
Steps to Delete a Record
- Open the ServBay management interface.
- Navigate to the
DNSoption in the left-hand menu. - On the right, select
DNS Server. - Find the record you wish to delete.
- Click the
Deletebutton (usually a trash can icon) to the right of the record. - A confirmation dialog will appear; confirm the deletion.
Once confirmed, the record will be removed from the local DNS list, and the corresponding domain will no longer resolve through ServBay.
Summary
With ServBay’s integrated dnsmasq server, managing local DNS records on macOS becomes intuitive and efficient. Offering a centralized interface, ServBay removes the need to manually edit the /etc/hosts file, letting you easily view, add, edit, pause, and delete custom domain mappings. This is crucial for local web development, application testing, and debugging. Whether you’re adding new local domains like servbay.demo for new projects, or updating existing records, ServBay’s DNS management has you covered—boosting your development productivity. Remember, for sites added via the ServBay Sites feature, their DNS records should be managed within the Sites section to ensure configuration consistency. By leveraging ServBay’s flexible DNS management, you can conveniently control domain resolution for your local development environment.
