
Manage the macOS Local Hosts File with ServBay
On macOS, the /etc/hosts file is a vital system file that maps specific hostnames (domain names) to designated IP addresses. This is particularly useful for local web development, testing certain services, simulating a production environment, or blocking specific websites. Manually editing the /etc/hosts file typically requires administrator privileges and can be error-prone. ServBay offers an intuitive, user-friendly graphical interface that allows you to easily view, add, edit, pause, and delete records in your local hosts file, greatly simplifying the management process. This article provides a detailed step-by-step guide to help you efficiently manage your local hosts file using ServBay’s features.
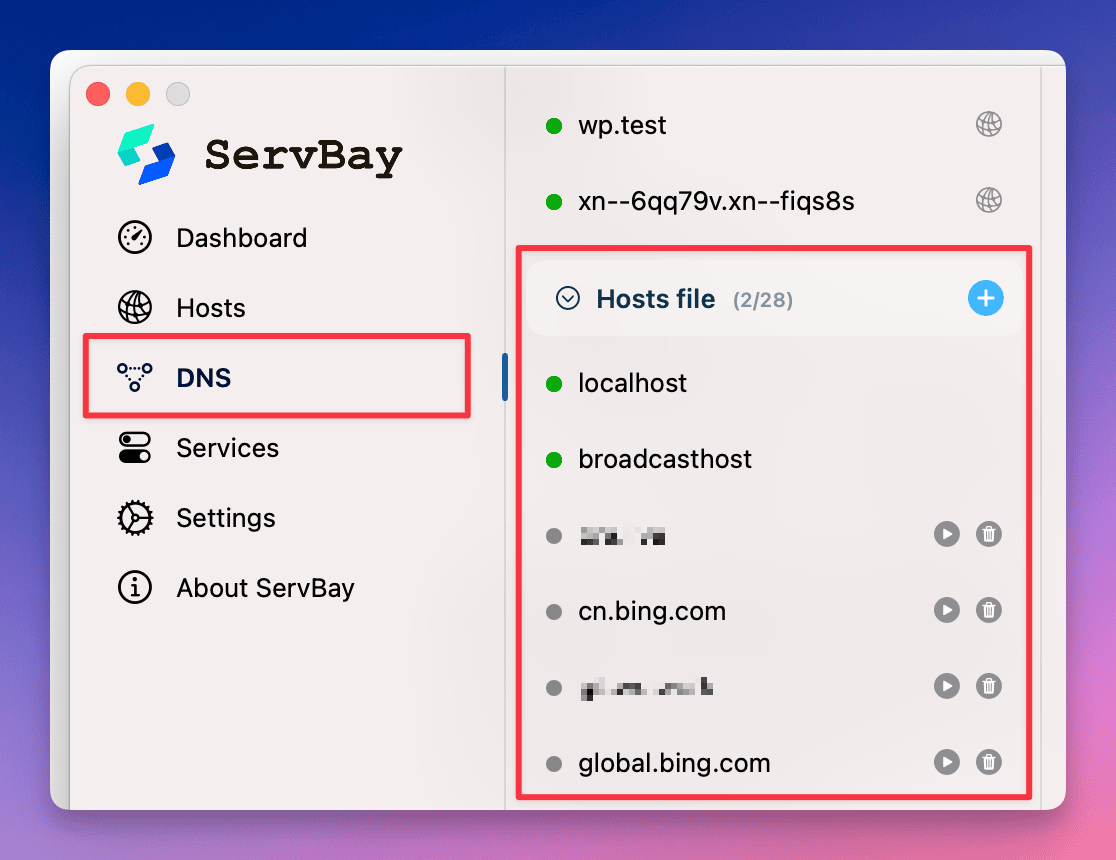
Viewing the Local Hosts File
The hosts file is located at /etc/hosts. With ServBay, you can easily view your current local hosts file contents without needing to open Terminal or use a text editor.
Viewing Steps
- Open the ServBay management interface.
- Navigate to the
DNSsection in the left-hand menu. - In the content area on the right, scroll down to locate the
Hosts filepanel. - ServBay will display the current contents of the
/etc/hostsfile in real-time.
ServBay’s interface provides a clear view of all configured hostname-to-IP address mappings, including records automatically added by ServBay as well as those you have manually added or modified.
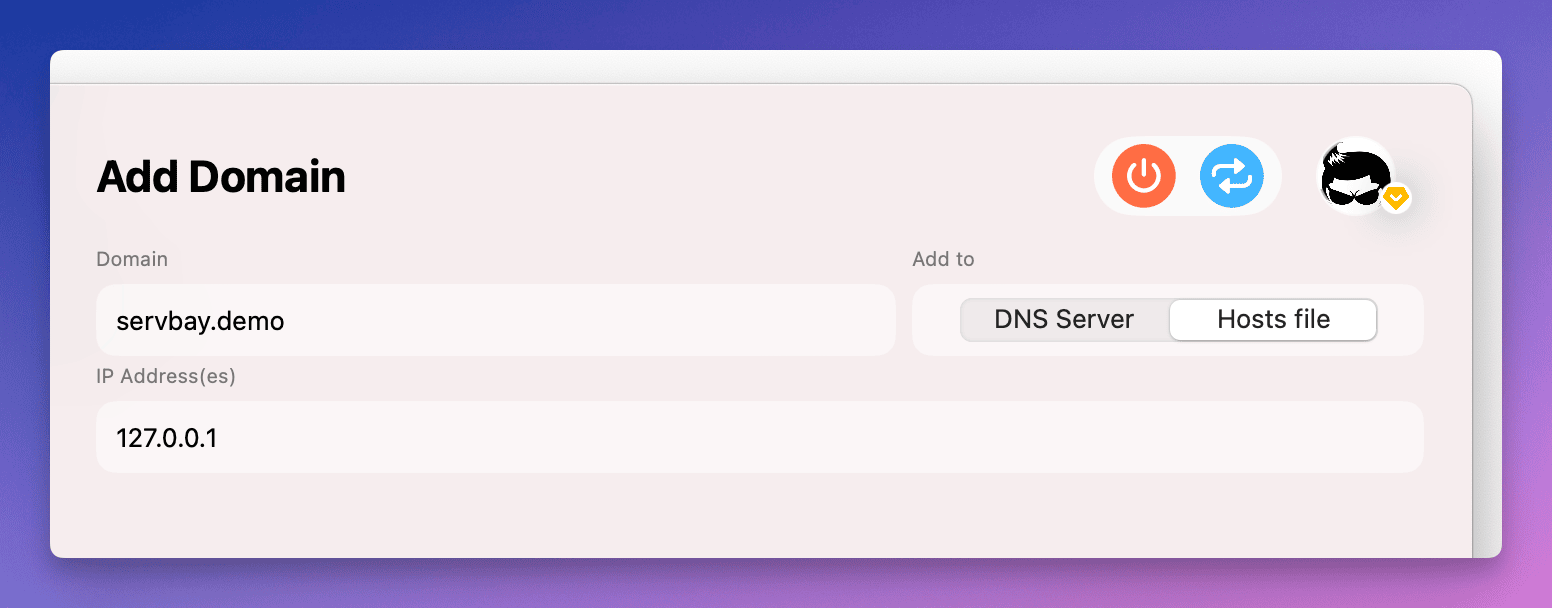
Adding New Hosts File Entries
During development or testing, you may want to map a specific domain name to an IP address (for example, mapping servbay.demo to 127.0.0.1 to point to your local server). With ServBay, it’s easy to add a new entry to your local hosts file.
Adding Steps
- Open the ServBay management interface.
- Navigate to the
DNSsection in the left-hand menu. - In the
Hosts filepanel on the right, click the+button at the top of the list. - In the pop-up input box, enter the record you want to add in the format
hostname IP address. For example:127.0.0.1 - Click the
Addbutton.
After clicking Add, ServBay will add the new hostname-to-IP mapping entry to the /etc/hosts file. Please note that modifying the hosts file typically requires administrator privileges, so ServBay will ask for your authorization if necessary.
TIP
ServBay supports mapping multiple IP addresses to the same domain name, as well as adding IPv6 addresses. Separate multiple IP addresses with a comma (,). For example: 127.0.0.1, ::1
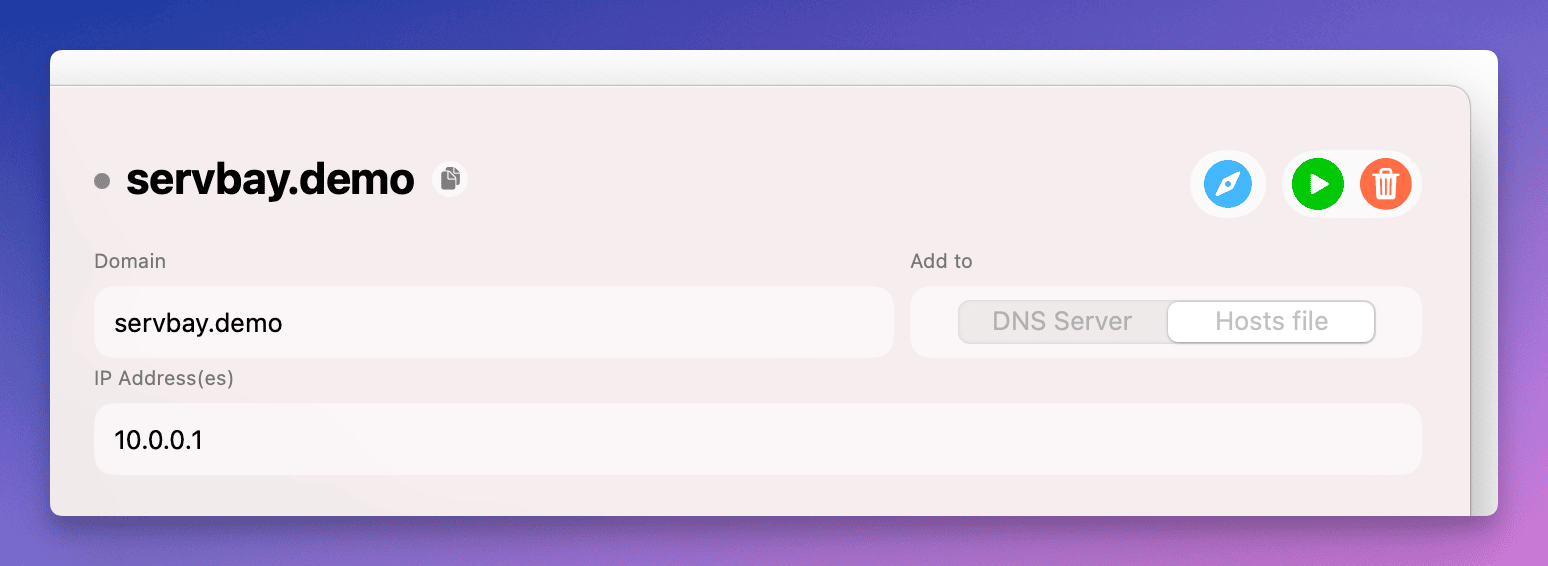
Modifying Existing Hosts File Entries
There may be times when you need to change the IP address mapped to an existing hostname. With ServBay, you can easily modify records in your local hosts file.
Modification Steps
- Open the ServBay management interface.
- Navigate to the
DNSsection in the left-hand menu. - In the
Hosts filepanel on the right, find the entry you wish to modify. - Click the row containing the record.
- In the edit panel that appears to the right, update the hostname or IP address. For example, change
127.0.0.1to10.0.0.1. - Once finished, click the
Savebutton.
ServBay will update the corresponding entry in the /etc/hosts file. As with adding records, this operation may also require administrator privileges.
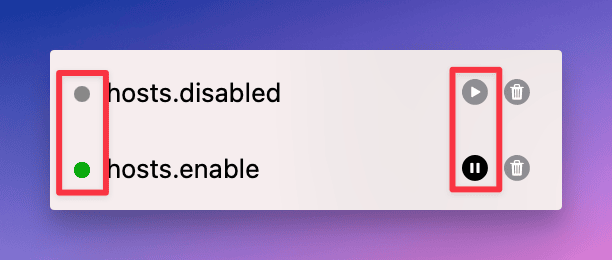
Pausing Hosts File Entries
Sometimes you may need to temporarily disable a hosts entry without deleting it. ServBay makes this straightforward.
Pausing Steps
- Open the ServBay management interface.
- Navigate to the
DNSsection in the left-hand menu. - In the
Hosts filepanel on the right, find the record you wish to pause. - Click the
Pausebutton (usually a pause icon) to the right of the record's row.
When you click the Pause button next to an entry, ServBay will add a comment character (#) in front of that line, which temporarily disables it without removing it. The status icon to the left of the record will change from green to gray, providing an at-a-glance indicator that the record is paused. This is especially convenient for testing or debugging when you need to temporarily disable specific mappings.
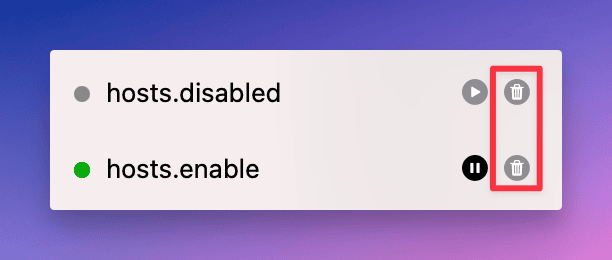
Deleting Hosts File Entries
If you no longer need a particular hosts entry, you can use ServBay to remove it from your local hosts file.
Deletion Steps
- Open the ServBay management interface.
- Navigate to the
DNSsection in the left-hand menu. - In the
Hosts filepanel on the right, find the record you want to delete. - Click the
Deletebutton (usually a trash can icon) to the right of the record's row. - You’ll be prompted to confirm the deletion. Confirm the action.
After confirming, ServBay will remove the selected hostname-to-IP entry from the /etc/hosts file. This action may also require administrator privileges.
Frequently Asked Questions (FAQ)
Q: What is the difference between pausing a record and deleting it?
A: Pausing a record (using ServBay's pause feature) simply adds a comment character (#) in front of the line, temporarily disabling it while keeping it in the file. Deleting a record removes the line entirely. The pause feature is convenient for temporarily disabling a mapping so that it can be restored later, while deletion is a permanent removal.
Q: What hosts entries does ServBay add automatically?
A: ServBay may automatically add certain records needed for internal services or default sites (such as servbay.host or servbay.demo), usually pointing to 127.0.0.1 or ::1. These are critical for ServBay’s functionality. It’s recommended not to modify or delete these automatically managed records unless you understand their purpose and the potential impact.
Summary
ServBay’s intuitive graphical interface makes managing the macOS /etc/hosts file easier than ever. You can quickly view, add, edit, pause, and delete entries—all without the risks and hassles of manual editing. Efficient hosts file management is essential for local development and testing, and ServBay’s hosts management features are designed with this need in mind, enabling you to configure your local network environment flexibly and conveniently, so you can stay focused on your development work.
