Adding the First Website
Adding a new website in ServBay is very simple and intuitive. This article will detail how to add the first website in ServBay, including steps, precautions, and solutions to common issues.
Overview
ServBay provides a user-friendly interface that makes adding and managing websites very simple. By following the steps below, you can easily add a new website in ServBay and configure settings to ensure the website runs smoothly.
Steps to Add a Website
Step 1: Open the ServBay Management Interface
First, locate ServBay in the application, and double-click to open it.
Step 2: Navigate to Host Management
After opening the program, you will see the main interface of ServBay. Click on Host in the left navigation menu. This will take you to the website management page.

Step 3: Add a New Website
On the website management page, click the + button at the bottom of the page. This will open a new form on the right to enter the basic information of the new website.
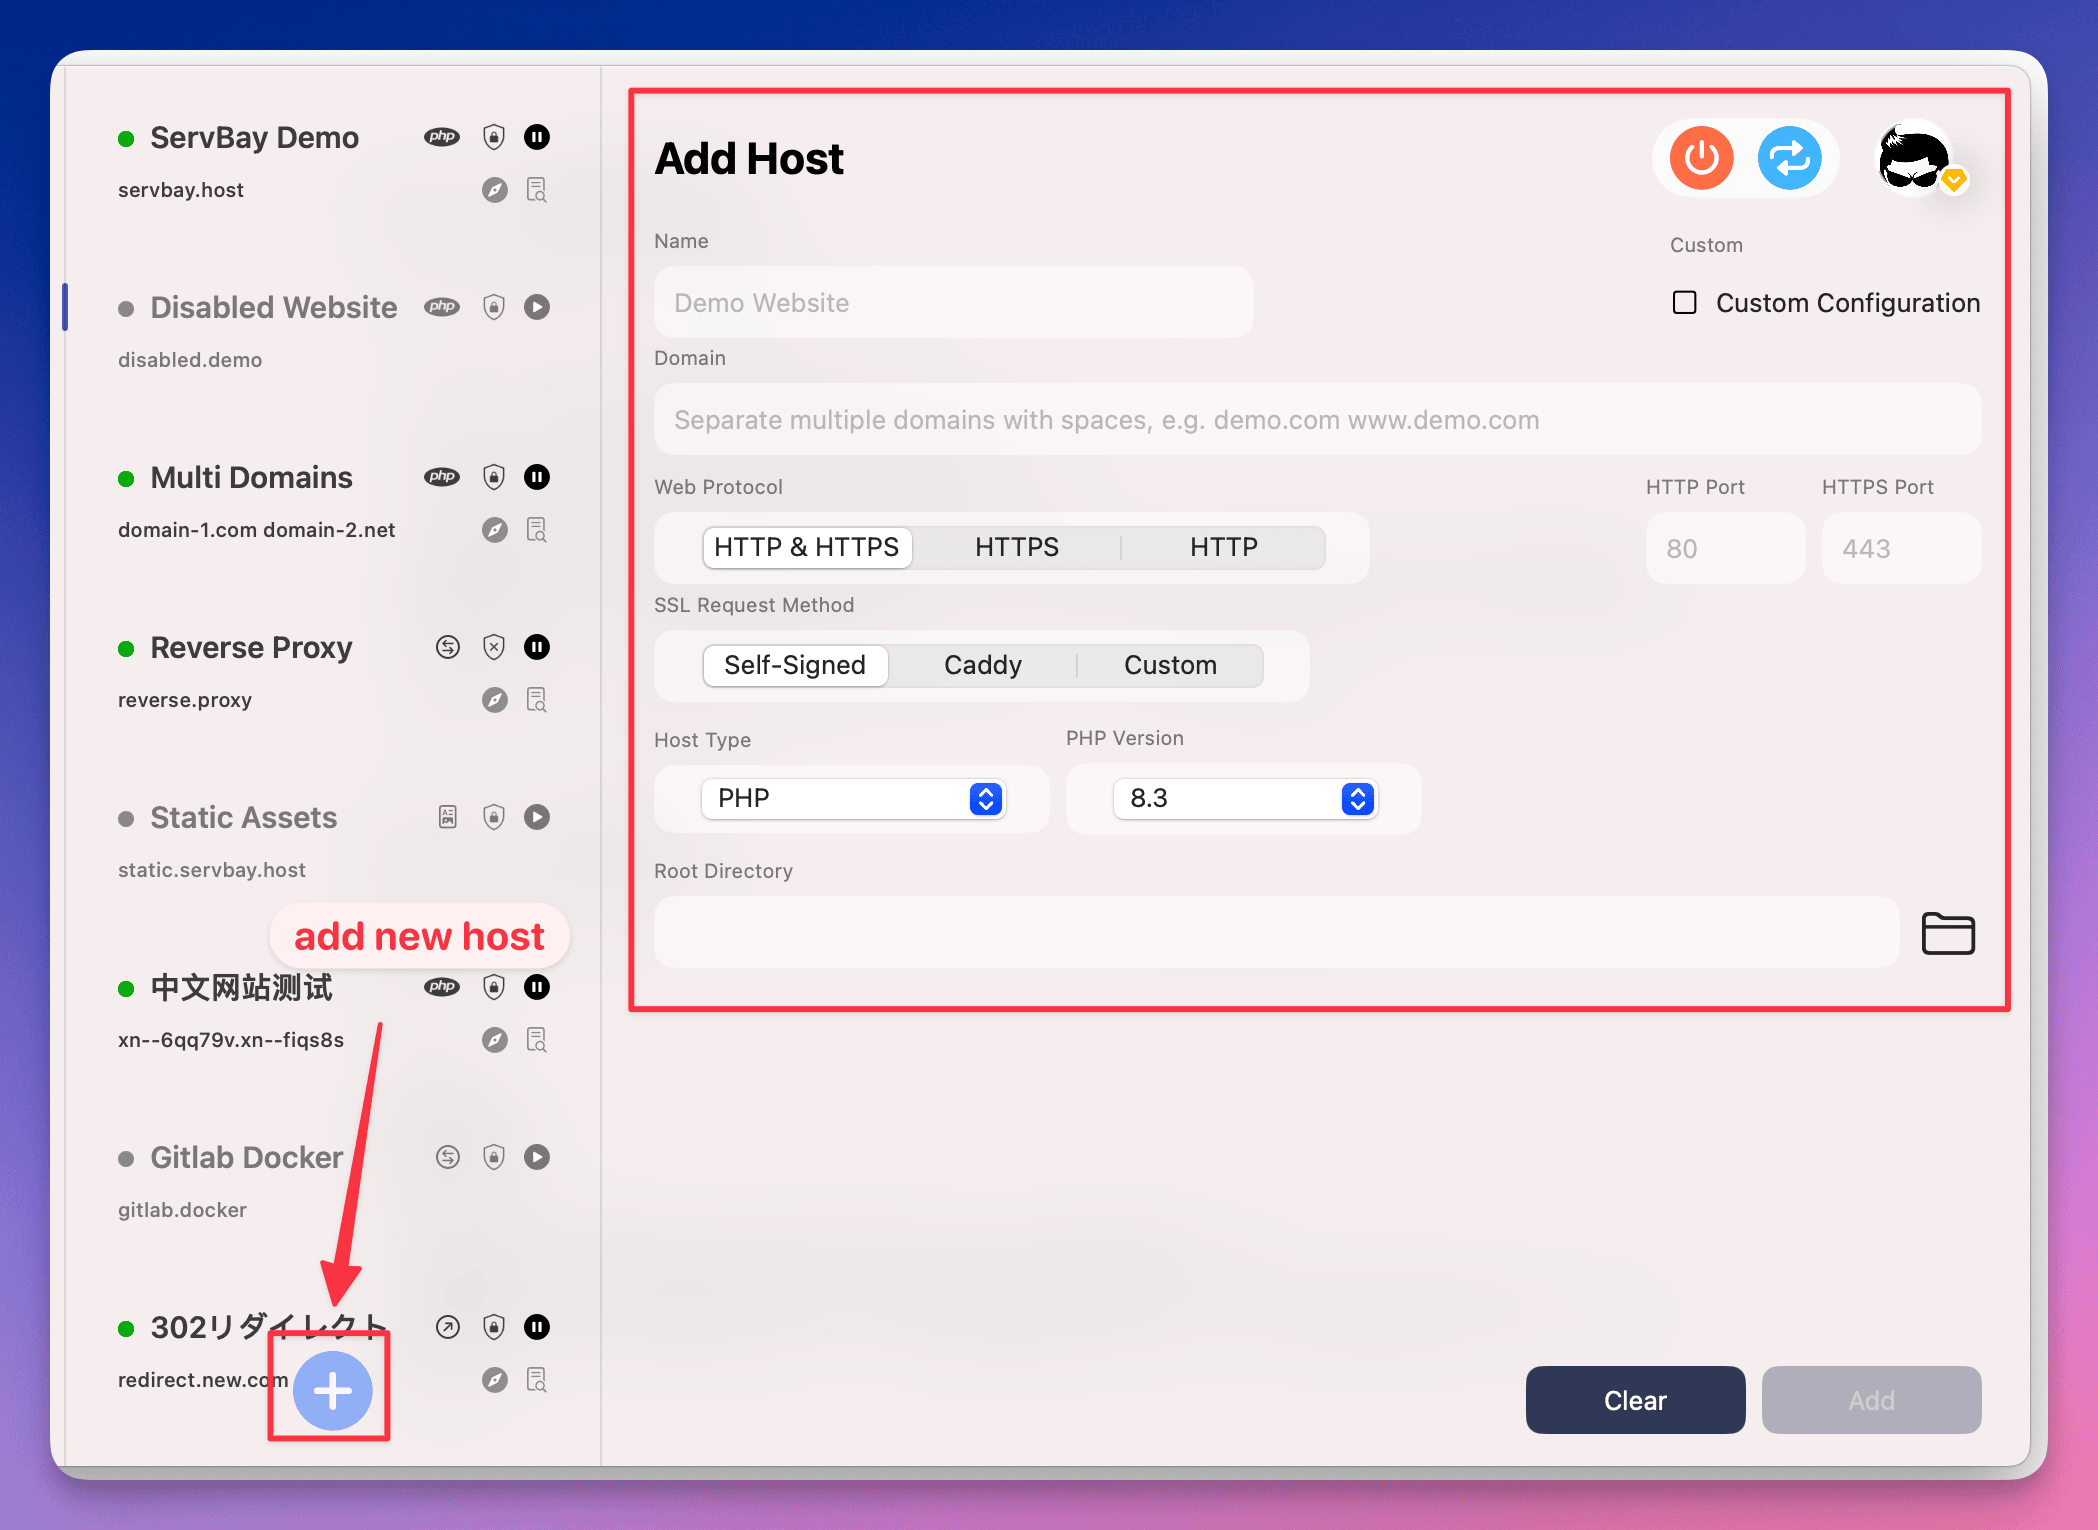
Step 4: Configure Website Settings
On the adding website page, you will need to fill out the following information:
- Name: The name of the website for identification.
- Domain: Enter the domain name of the website you want to add, such as
servbay.demo. - Protocol: The protocols supported by the website, default is HTTP/HTTPS.
- SSL Certificate Request Method: It is recommended to choose
Self-Signed, which will be automatically generated and managed by ServBay. - Website Type: The type of website, PHP, Static, Reverse Proxy, or Redirect.
- PHP Version: Choose the PHP version to be used by the website. Make sure the selected PHP version is installed and running.
- Root Directory: Choose or enter the path to the website files root directory, such as
/Applications/ServBay/www/demo/servbay.

Step 5: Complete and Save
After filling out all necessary information, click the Add button. ServBay will automatically create the new website configuration and make corresponding settings on the host.
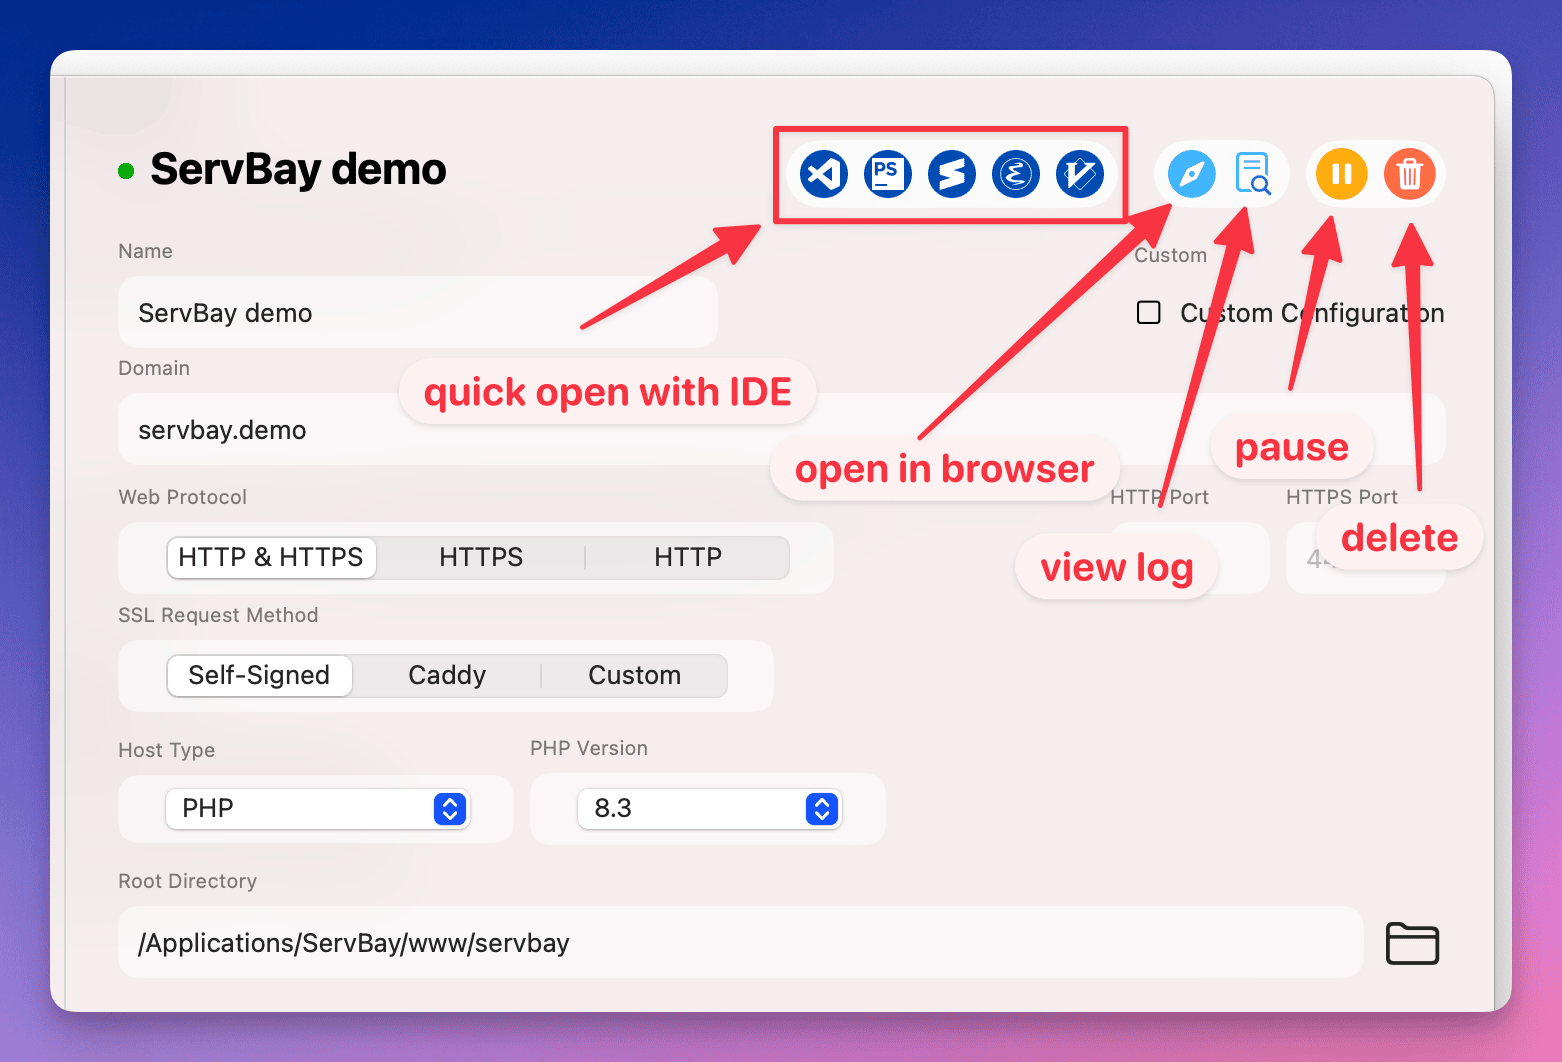
Once saved successfully, you can click the browser icon in the top right corner to access the website.
Step 6: Quick Actions
ServBay provides a series of quick action buttons for the website, including:
- Open the website in IDE for quick editing
- Open the website in the browser
- View website logs
- Pause or start the website
- Delete the website
Summary
Adding the first website in ServBay is a simple and intuitive process. By following the steps above, you can easily add and configure a new website. With proper configuration and management, you can ensure that the website runs stably in the ServBay environment. If you encounter any issues, you can refer to common problems and solutions for troubleshooting and fixing.