
Guide to Configuring Cloudflared (Cloudflare Tunnel) in ServBay
Cloudflared is a powerful tool from Cloudflare that allows you to securely expose locally running web services to the public internet through Cloudflare's global network, without having to open firewall ports or set up complicated networking. With Cloudflare Tunnel, you get HTTPS encryption, DDoS protection, and Cloudflare CDN performance for your local development projects. ServBay has built-in support for Cloudflared, streamlining its setup and management on macOS.
This guide details the steps for setting up and using Cloudflared tunnels within ServBay.
Overview
Integrating ServBay with Cloudflared enables developers to easily connect local websites hosted in ServBay to Cloudflare’s network. This means you can access your local development environment from anywhere using custom subdomains (e.g., test.yourdomain.com).
Use Cases
- Professional Demos: Present your local development work to clients or teams using your branded domain.
- Stable External Testing: Provide a reliable public endpoint for API testing, webhook integrations, or collaboration with third-party services that require steady, accessible URLs.
- Leverage Cloudflare’s Ecosystem: Benefit from Cloudflare’s security layer (e.g., WAF, bot management) and performance features (e.g., CDN caching, Argo Smart Routing—if applicable).
- Replace Traditional DDNS: Offer a stable public domain name for local services running behind dynamic IP addresses.
Prerequisites
- ServBay Installed: Ensure ServBay is installed and running on your macOS system.
- Cloudflare Account: You need to have a valid Cloudflare account.
- Managed Domain Name: You must own a domain name that is active in your Cloudflare account, with its DNS managed by Cloudflare (for example,
yourdomain.com). Cloudflared will create subdomains under this domain. - Cloudflare Zero Trust Setup: You need to create an organization (Team) in your Cloudflare Zero Trust dashboard. This is required to use Cloudflare Tunnel.
- Visit the Cloudflare Zero Trust Dashboard.
- If you haven't created a team yet, follow the prompts to set your team name. This process is typically free.
- Local Website: Have at least one local website added and running in ServBay, such as
servbay.demo.
Steps
1. Install the Cloudflared Package in ServBay
- Open the ServBay application.
- In the left sidebar, click Packages.
- Find or search for
Cloudflaredin the package list. - Click the install button next to
Cloudflared.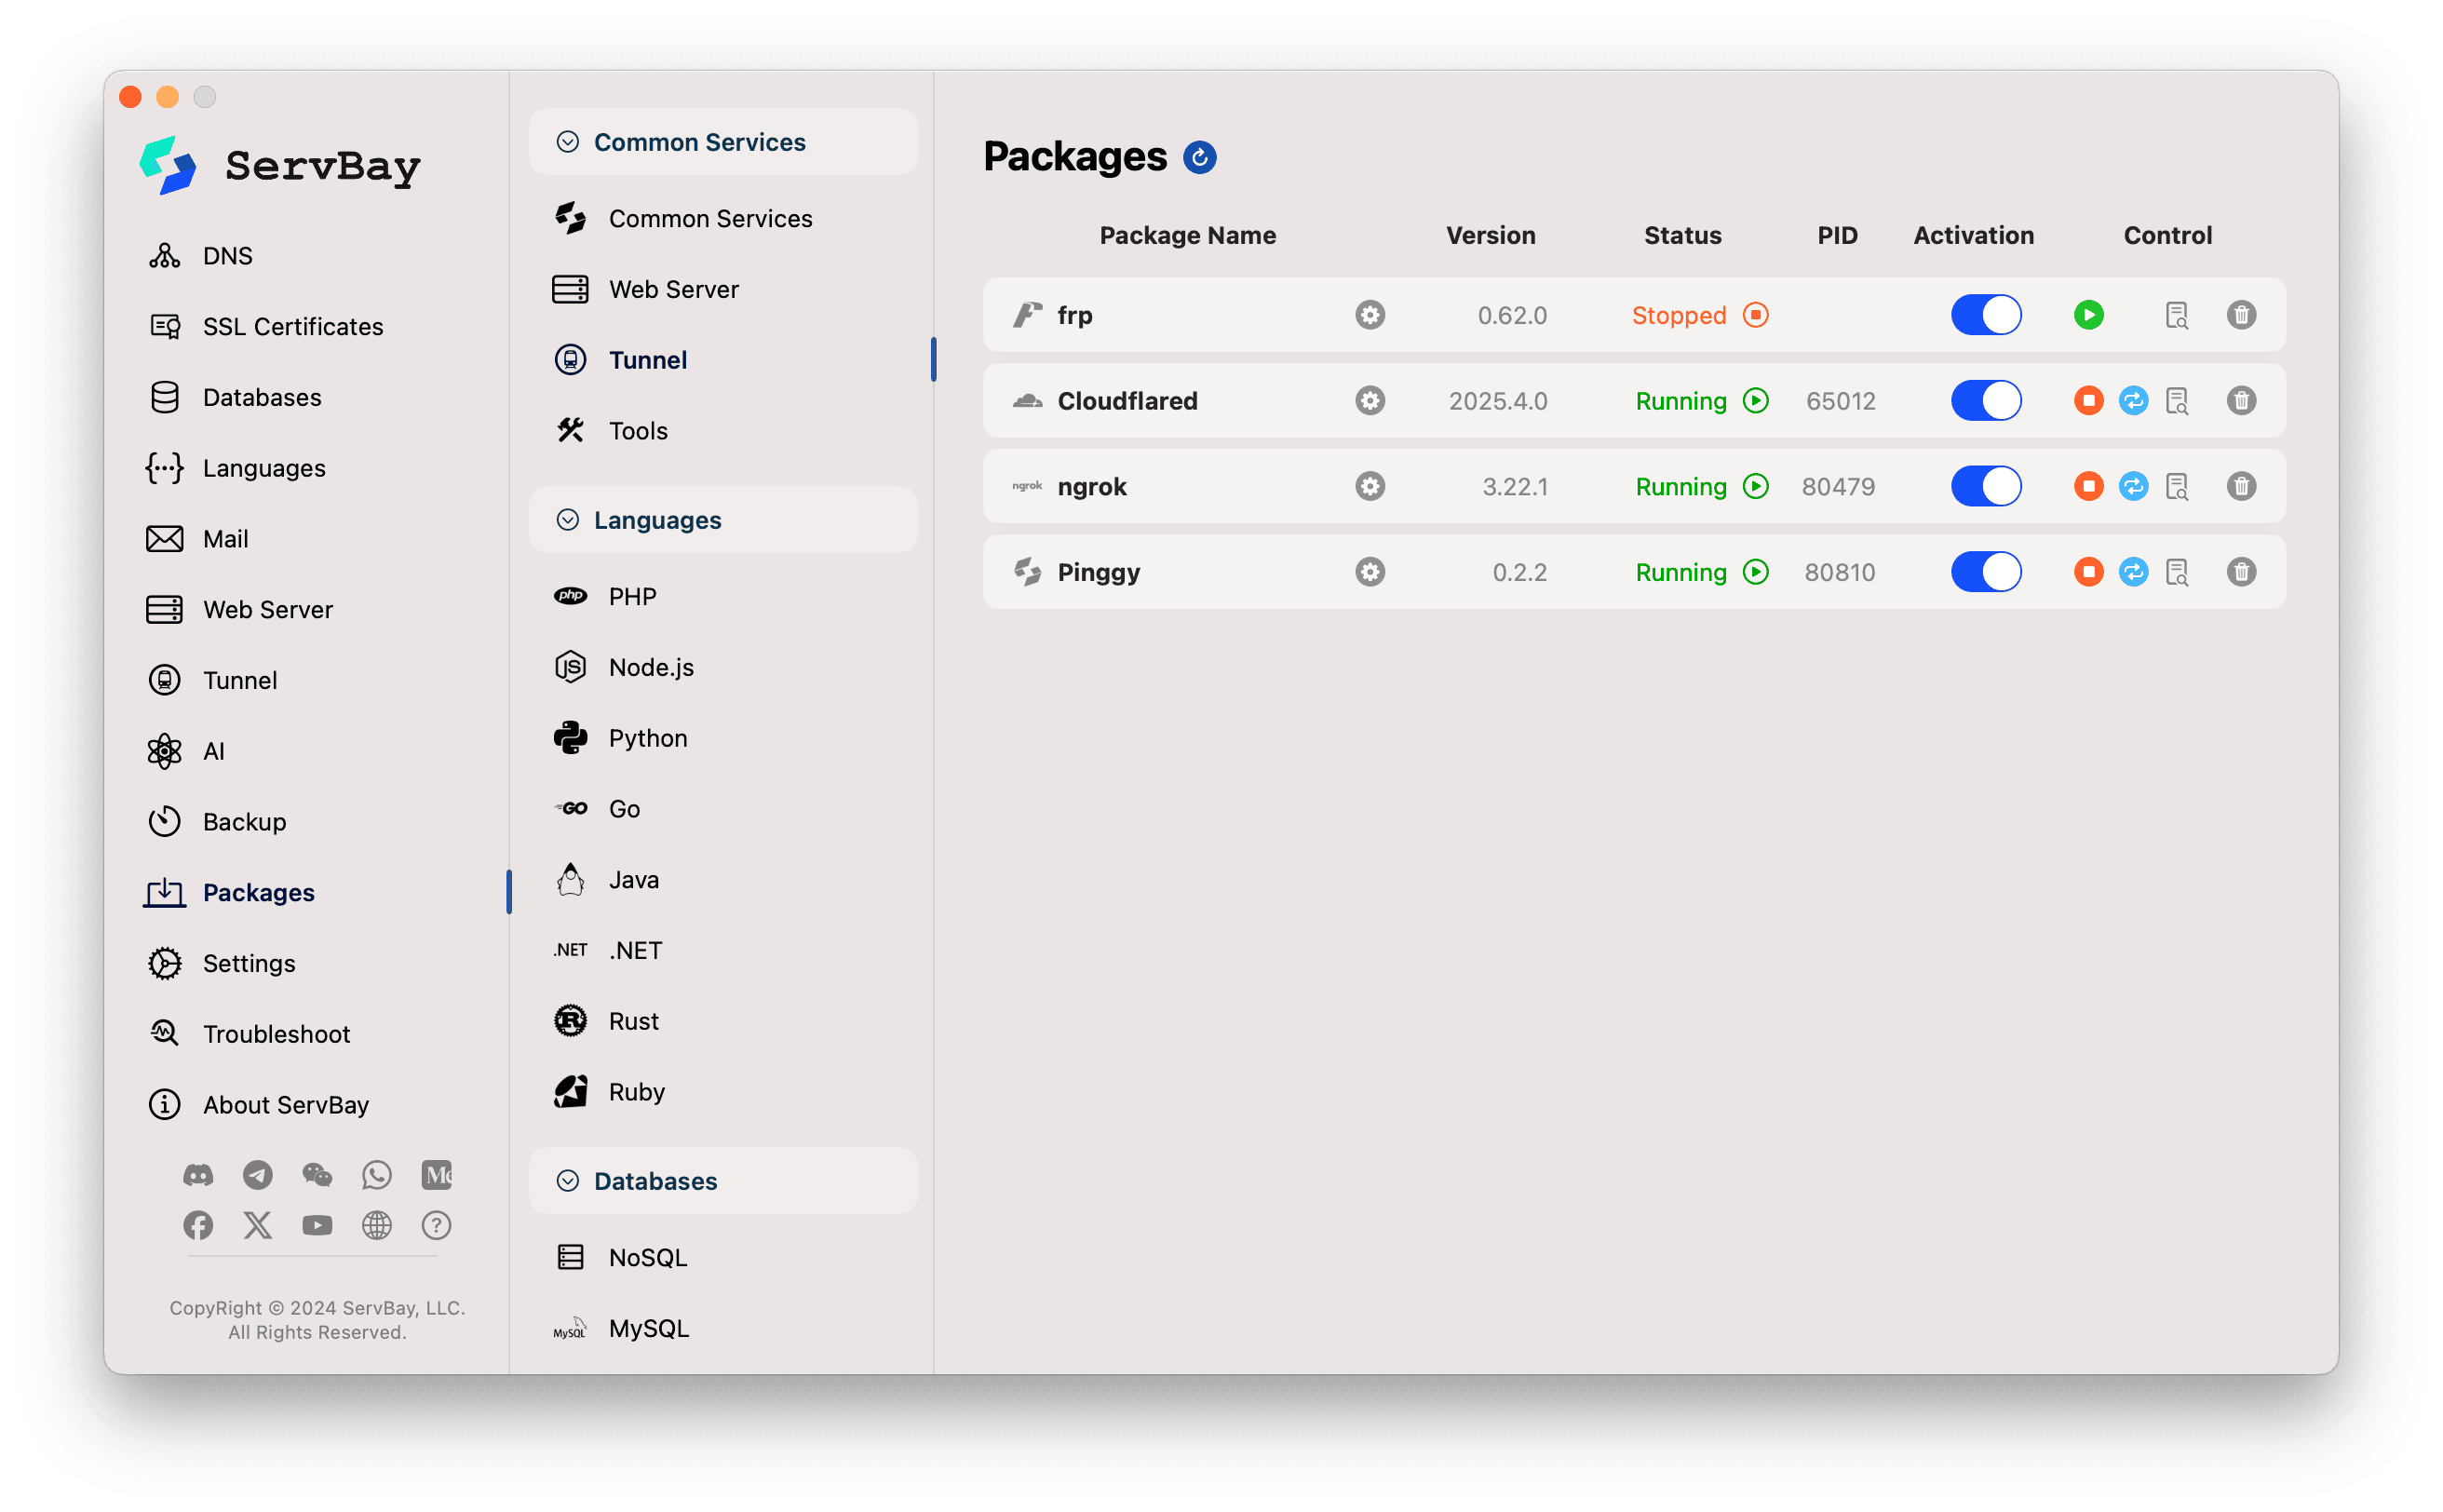
- Once installed, you can try toggling the switch next to
Cloudflaredto start the service. It may not start yet due to missing authorization—this is expected.
2. Authorize ServBay to Access Your Cloudflare Account
To let ServBay create and manage Cloudflare Tunnels and related DNS records on your behalf, you need to authorize it:
- In the ServBay sidebar, click Tunnel.
- In the Tunnel services list, select Cloudflared.
- You will see a Login Authorization button (or similarly named). Click this button.
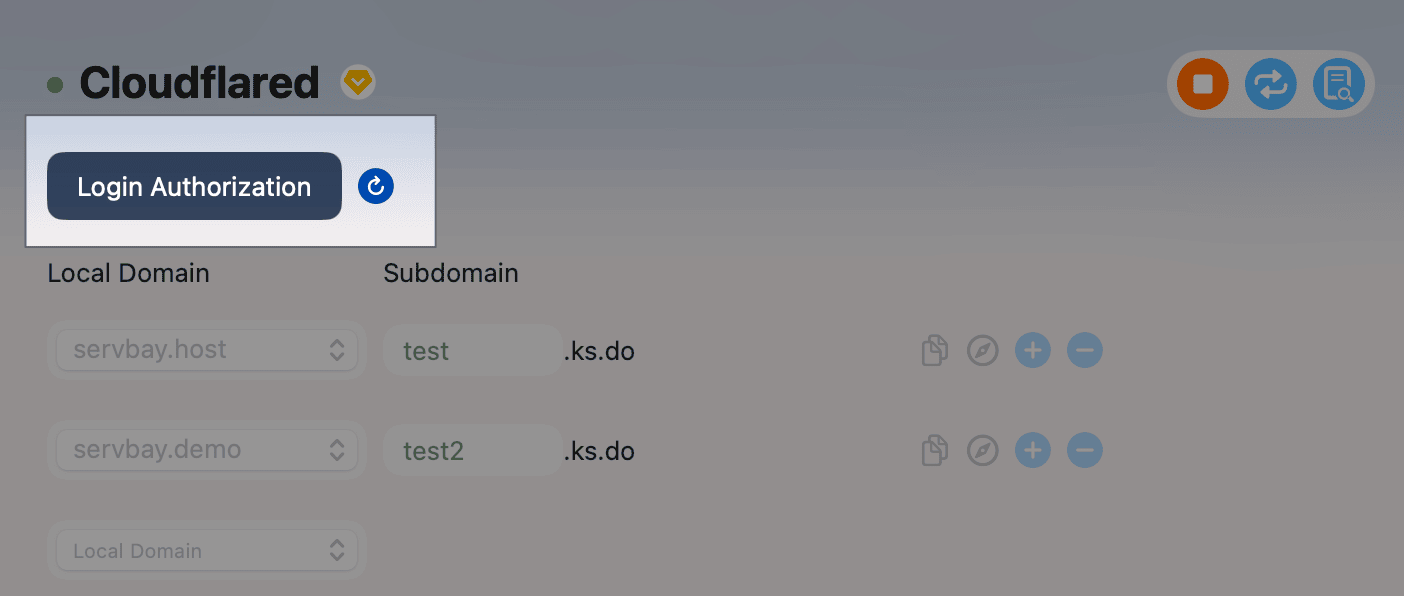
- ServBay will open a new browser window, redirecting you to Cloudflare’s authorization page.
- On the Cloudflare page, you’ll be asked to log in (if not already), then select which domain you wish to authorize for ServBay (Cloudflared) use. Be sure to select the domain managed by Cloudflare, as mentioned in the prerequisites.
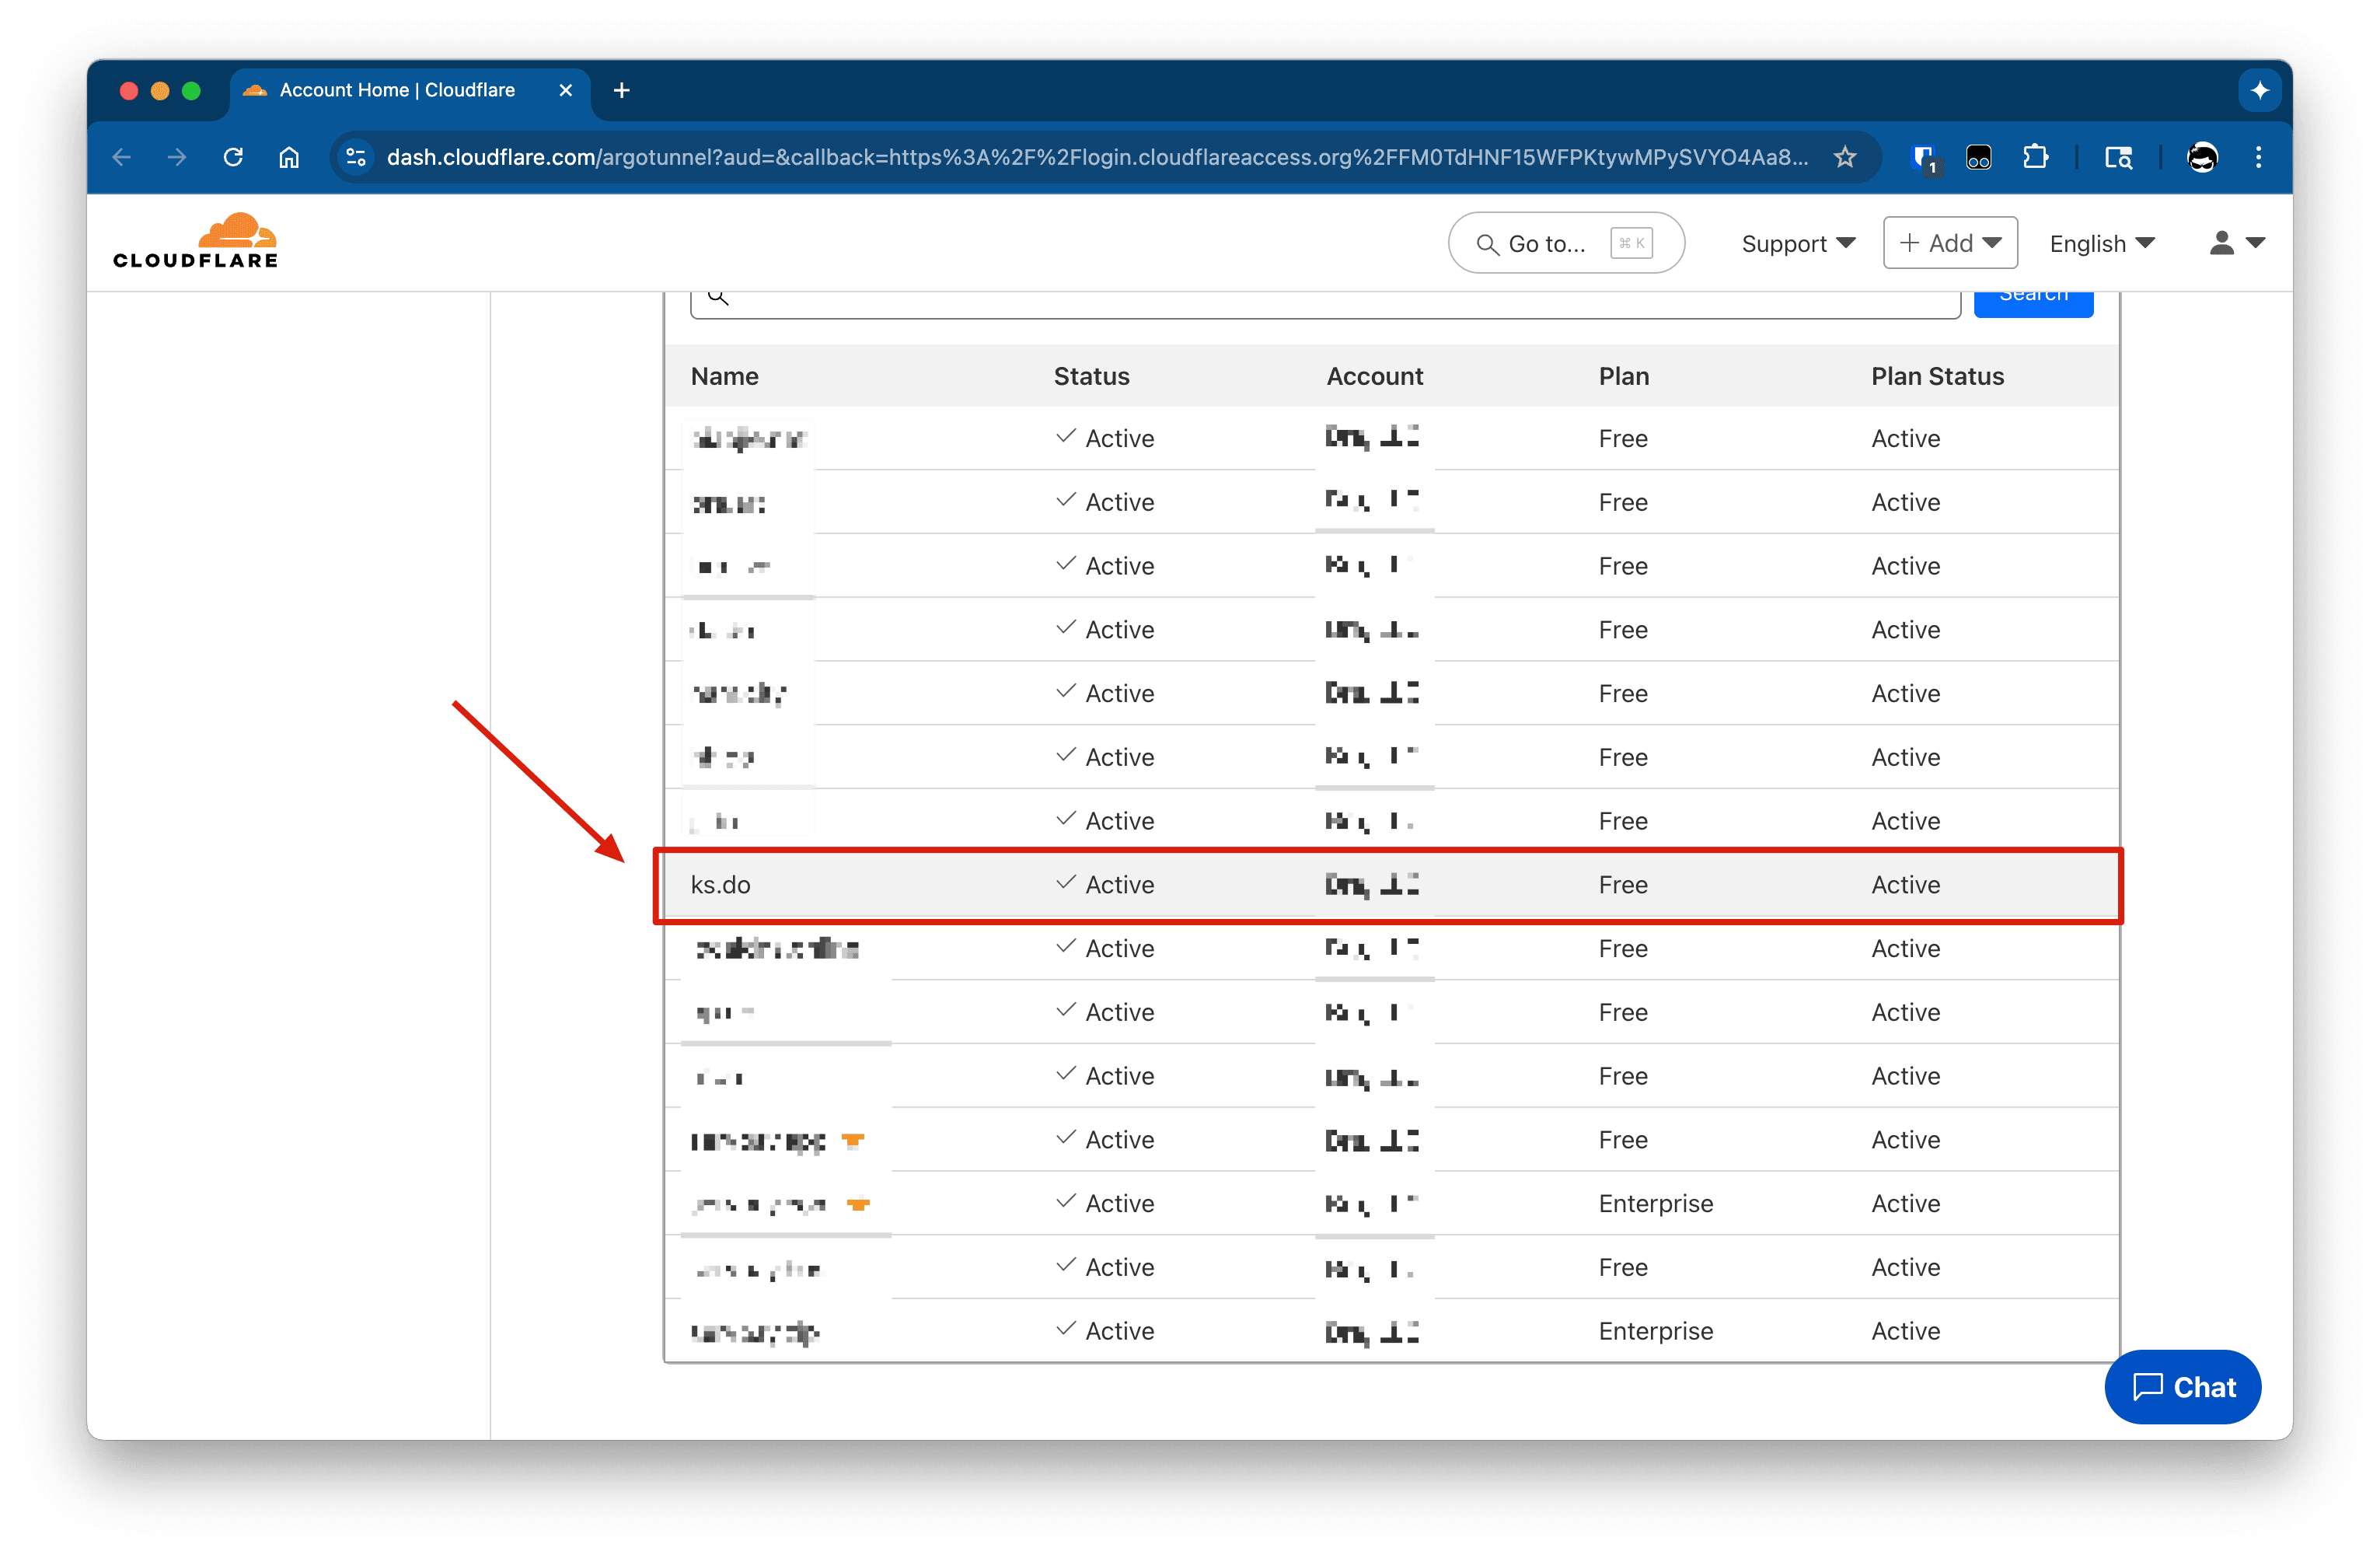
- Complete the authorization flow as prompted by Cloudflare.
- After successful authorization, return to the ServBay application.
- In the Cloudflared configuration interface, click the refresh icon next to the Login Authorization button (if the button text hasn't updated). This refreshes the authorization status in ServBay.
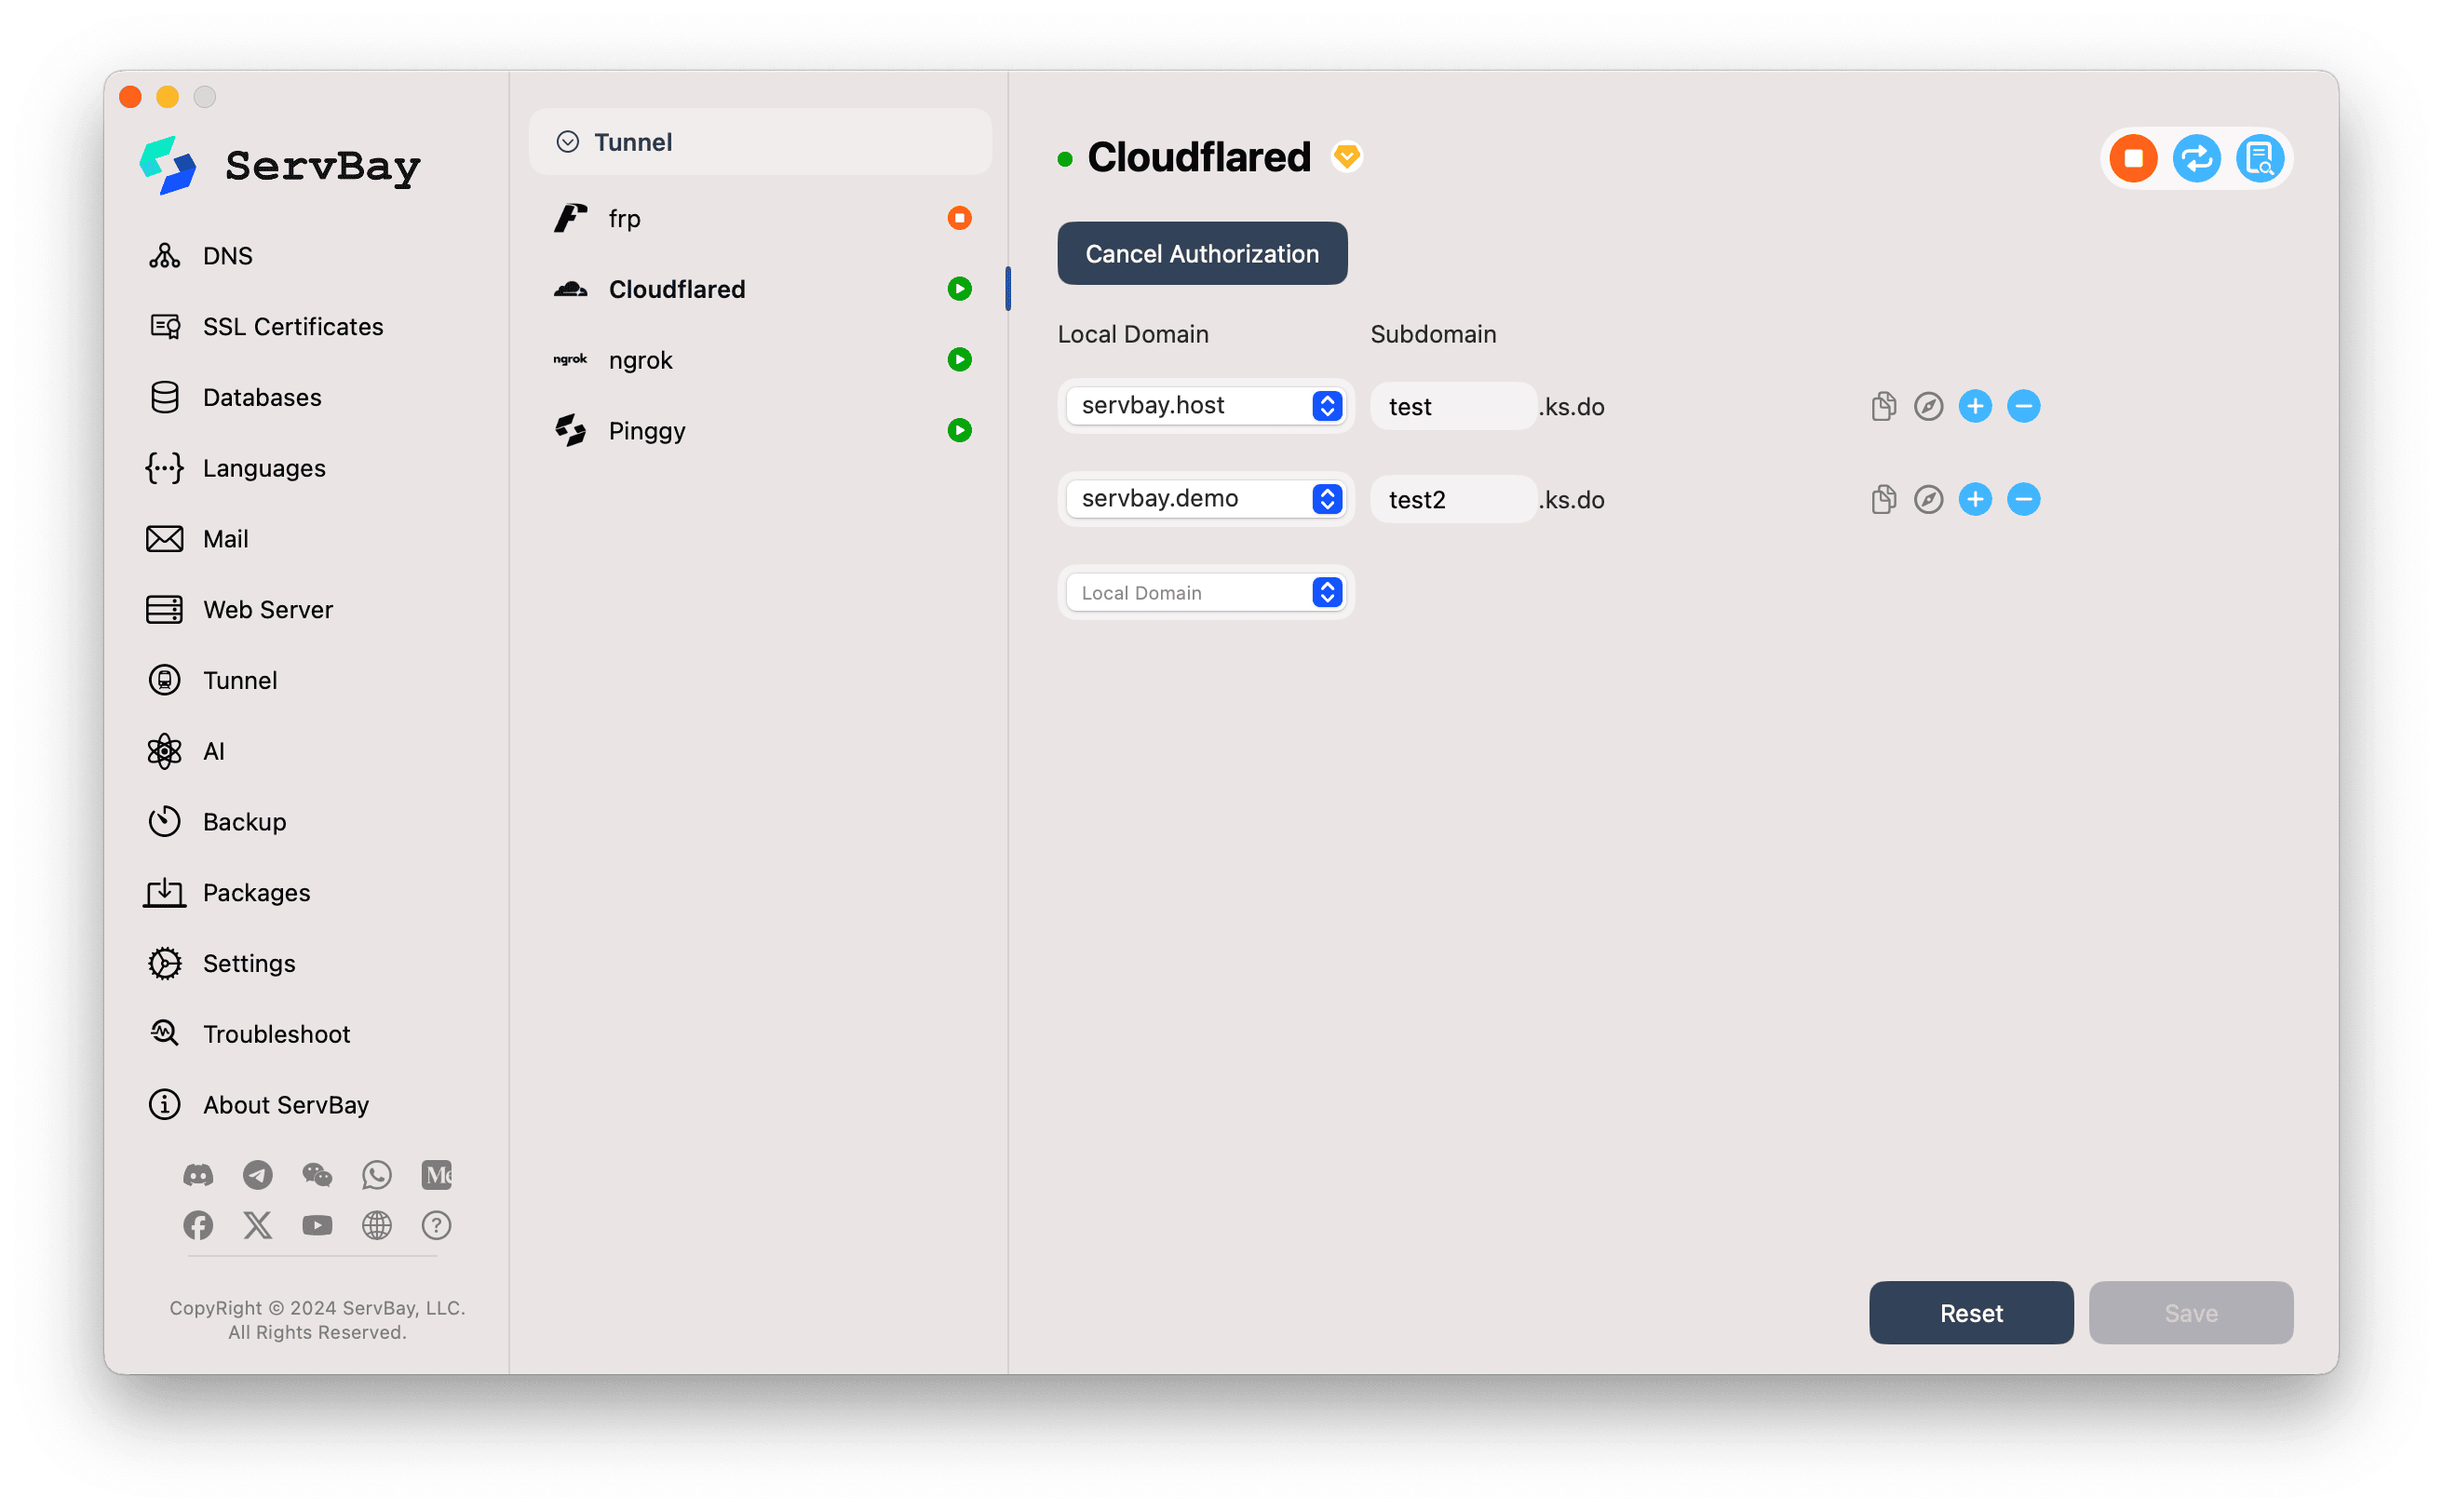
- If successful, the Login Authorization button will change to Cancel Authorization.
3. Configure Tunnels in ServBay
Once authorized, you can set up tunnels:
Local Domain (Local Website):
- Click the dropdown and select the local ServBay website you want to expose via Cloudflared. For instance, select
servbay.demo.
- Click the dropdown and select the local ServBay website you want to expose via Cloudflared. For instance, select
Subdomain:
- In the input field, specify a subdomain for your chosen local site. For example, enter
testorproject-alpha. - ServBay will combine this subdomain with the Cloudflare-managed domain you authorized, forming the final public URL. If your authorized domain is
yourdomain.comand you entertest, your public URL will betest.yourdomain.com. - The interface will show your authorized domain’s suffix, e.g.,
.yourdomain.com(in the screenshot,.ks.dois an example).
- In the input field, specify a subdomain for your chosen local site. For example, enter
Add More Tunnels:
- To expose additional local websites (each with a different subdomain), click the
+(plus sign) next to the existing tunnel row to add another tunnel configuration. Repeat the steps for more sites and subdomains.
- To expose additional local websites (each with a different subdomain), click the
4. Save Configuration and Start the Service
- After configuring all tunnels, click the Save button in the lower right.
- ServBay will:
- Create a Cloudflare Tunnel named
servbay-tunnel-xxxxx, wherexxxxxis a randomly generated identifier. - Communicate with the Cloudflare API to add each entry to your Tunnel.
- Automatically create the necessary CNAME DNS records under your authorized Cloudflare zone for every tunnel, pointing the subdomains to the tunnel.
- Create a Cloudflare Tunnel named
- After saving, the Cloudflared service should start automatically (or you can manually toggle the start switch). Check the indicator light next to
Cloudflared: green means it’s running. - Verify Access:
- You should now be able to access your local site from anywhere using the configured public URL (such as
test.yourdomain.com). - Click the Copy icon next to the public URL to copy it, or click the Browser icon to open it directly in your browser.
- You should now be able to access your local site from anywhere using the configured public URL (such as
Note
- Because Cloudflared has numerous nodes, establishing the tunnel after saving may take some time. Please do not attempt to access your site immediately after clicking save. Wait a few seconds until ServBay confirms success before proceeding.
- DNS record creation and propagation worldwide can take anywhere from a few seconds to several minutes. If you cannot access your site right away, wait and try again. You can also clear your local DNS cache by using
sudo killall -HUP mDNSResponder.
5. Manage Cloudflared Tunnels
Within ServBay's Cloudflared configuration interface:
- Copy external domain: Click the copy icon.
- Open in browser: Click the browser icon.
- Add tunnel: Click the
+icon. - Remove tunnel: Click the
-(minus) icon and save changes. Removing a tunnel prompts ServBay to delete the corresponding Cloudflare Tunnel and DNS record. - Cancel authorization: Click Cancel Authorization to revoke ServBay’s access to your Cloudflare account. This will disable all configured Cloudflared tunnels.
- Stop/Start service: Toggle the switch next to the
Cloudflaredservice entry to fully stop or start the Cloudflared service.
Important Notes
- DNS Propagation: DNS record changes for new or updated subdomains can take time to go live across the globe.
- Cloudflare Tunnel Management: You can also log in to your Cloudflare Zero Trust Dashboard (usually under Access -> Tunnels) to view and manage tunnels created by ServBay.
- Security: Cloudflare Tunnel is secure by default. You can further configure additional security policies—such as WAF rules, access controls, and more—via the Cloudflare dashboard.
- Domain Authorization Limitation: Generally, ServBay can only authorize and use one domain under one Cloudflare account at a time for tunnel creation. If you need to use a different root domain, you may need to cancel the current authorization and re-authorize the new domain.
- Cloudflare Terms of Service: Make sure your usage complies with Cloudflare’s terms.
- Mainland China Users: Cloudflared services may not be stable or available if accessed from Mainland China.
Frequently Asked Questions (FAQ)
- Q: After clicking “Login Authorization,” Cloudflare shows an error or doesn’t list the domain—what do I do?
- A: Ensure you are logged into the correct Cloudflare account, and the account does indeed have DNS-managed domains within Cloudflare. Also, verify you have set up a team in Cloudflare Zero Trust.
- Q: I’ve configured and saved my subdomain, but
subdomain.mydomain.comisn’t accessible?- A: First, wait a few minutes for DNS propagation. Next, check ServBay to ensure the Cloudflared service status is green (running). Finally, log in to the Cloudflare dashboard to check that the corresponding Tunnel was successfully created and is healthy, and that the DNS record exists.
- Q: How is Cloudflared different from Ngrok or Pinggy?
- A: The main advantage of Cloudflared is its deep integration with Cloudflare’s infrastructure and security features. It lets you use your own branded domains and subdomains, making it ideal for stable, professional, and protected public access. Ngrok and Pinggy are generally more convenient for quick, temporary sharing, especially for free users.
Summary
With ServBay’s Cloudflared integration, macOS developers can easily harness the robust and secure infrastructure of Cloudflare to publicly expose local development projects in a professional way. By following this guide, you can quickly set up and run Cloudflare Tunnels, taking advantage of custom domains as well as additional protection and performance enhancements offered by Cloudflare.
